As a young adult eager to learn new skills, diving into the art of baking with honeycrisp apples is an exciting journey. These sweet and tangy fruits possess unique properties that make them perfect for whipping up delicious baked goods. From mastering the basics of preparing apples for baking to exploring creative recipes and presentation tips, this guide will provide a comprehensive understanding of honeycrisp apple baking, catering to various dietary preferences and skill levels.
Understanding Honeycrisp Apples: Flavor, Texture, and Best Uses in Baking
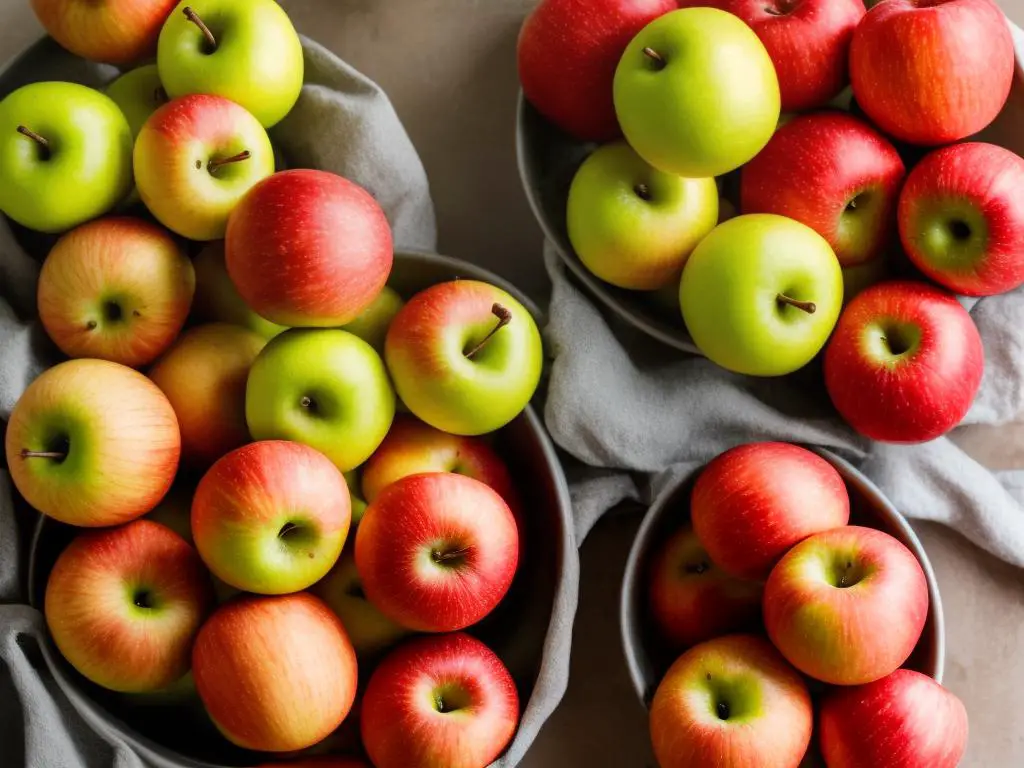
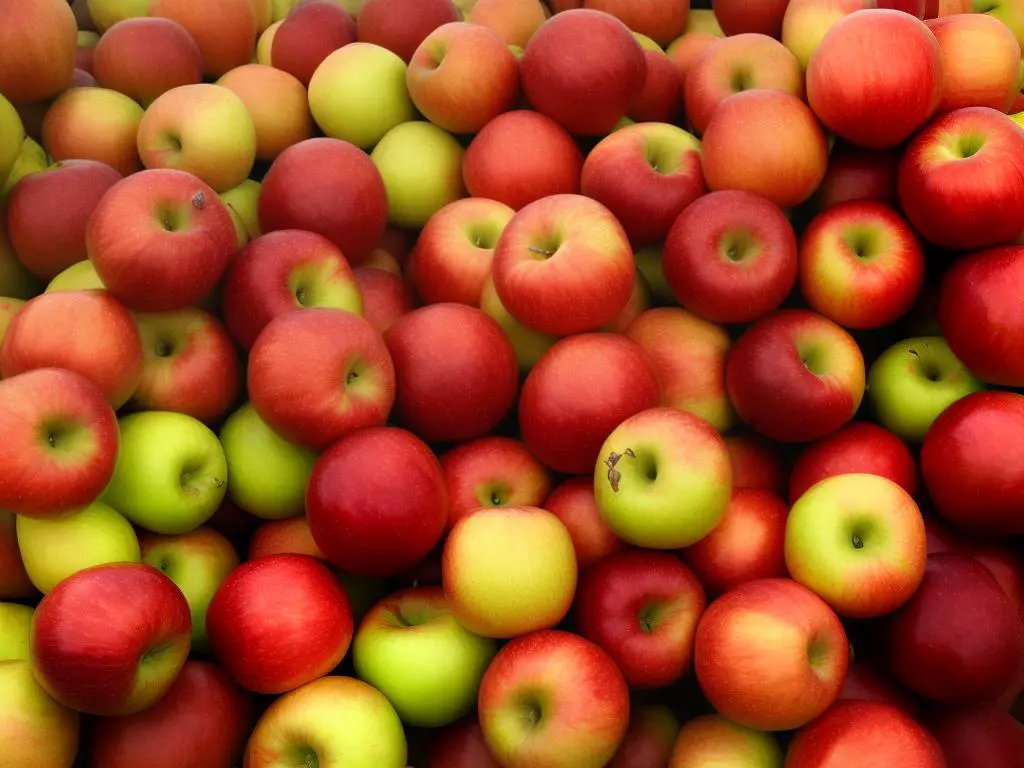
Honeycrisp apples are a delicious and versatile fruit that has gained popularity in recent years due to their unique flavor and texture. As a young adult learning how to do things, including baking, understanding the properties of Honeycrisp apples will enhance your culinary skills. This guide will provide you with information on the flavor, texture, and best uses of Honeycrisp apples in baking.
Flavor
Honeycrisp apples have a well-balanced sweet-tart flavor, which makes them perfect for baking. This delightful apple variety is known for its honey-like sweetness, combined with a subtle tartness that works well in a variety of baked goods. When baked, Honeycrisp apples maintain their flavor and do not become overly sweet or lose their tangy notes.
Texture
One of the main reasons why Honeycrisp apples have become so popular is their pleasing texture. They are incredibly crisp and juicy, providing a satisfying crunch when bitten into. Their firm texture holds up well when baked, maintaining a nice balance between firmness and tenderness. They do not become overly soft or mushy, which can be a common issue with some other apple varieties when used in baking.
Best Uses in Baking
Given their excellent flavor and texture, Honeycrisp apples can be used in a wide range of baked goods. Here are some ideas for using Honeycrisp apples in your baking endeavors:
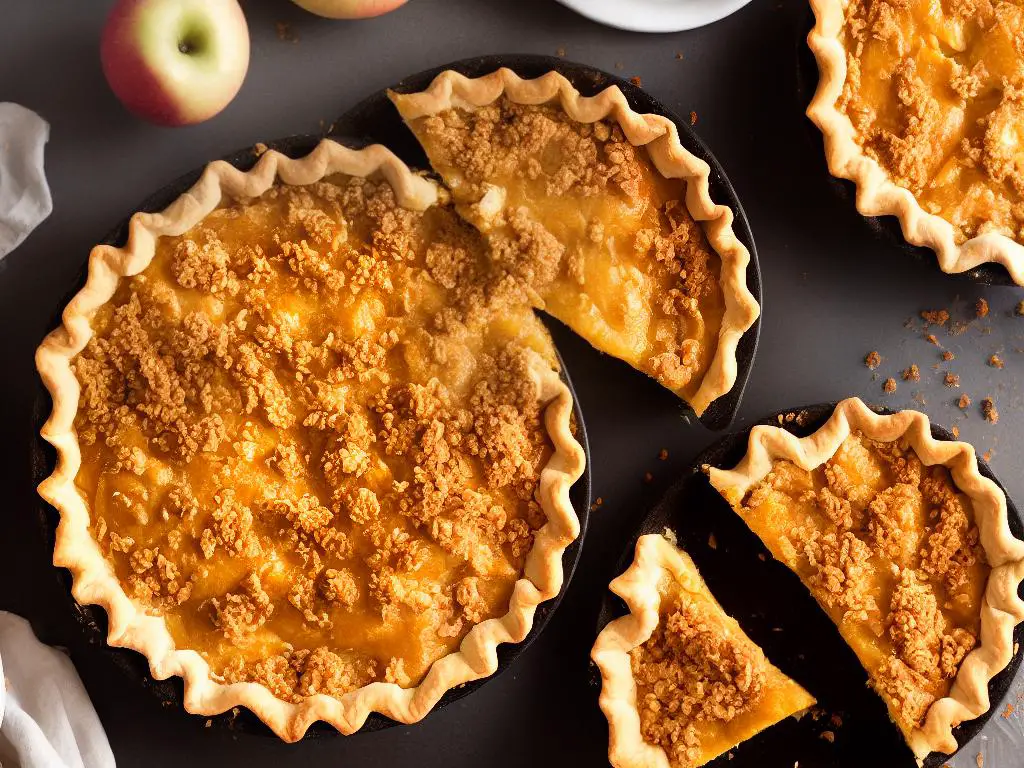
- Apple pie: Honeycrisp apples make a delicious apple pie filling, adding a pleasant sweetness and a nice balance of firmness and tenderness. You can either use them on their own or mix them with other apple varieties for a more complex flavor profile.
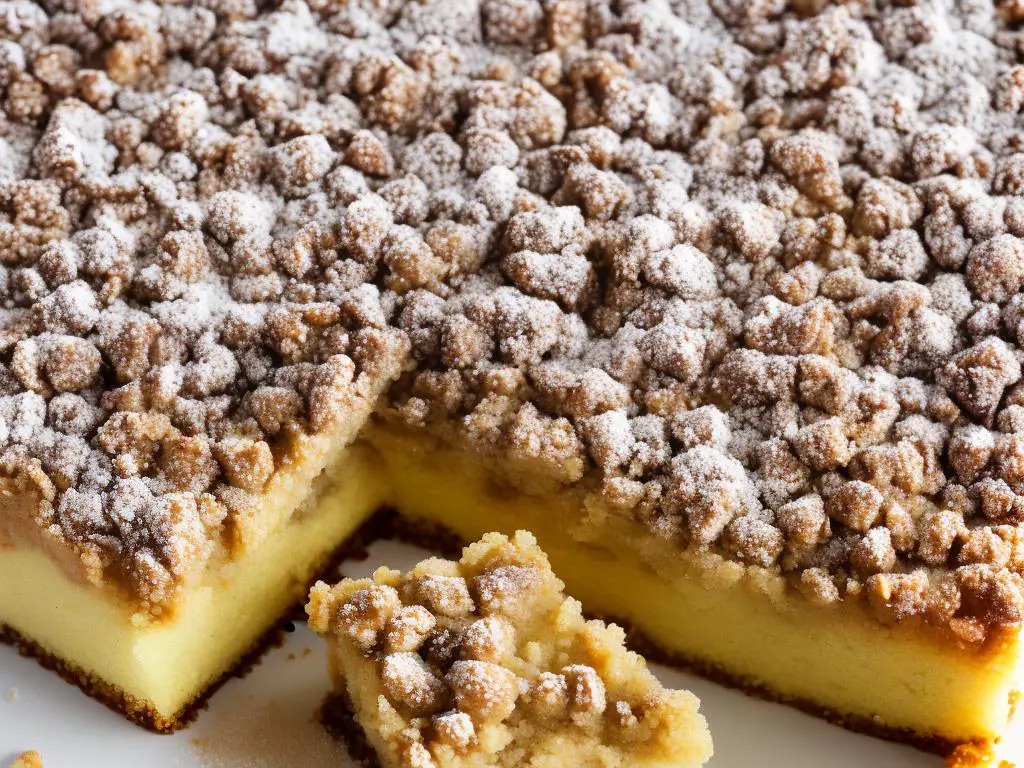
- Apple crisps and crumbles: The crisp texture of Honeycrisp apples works well in apple crisps and crumbles, where they are combined with oats, flour, butter, and sugar to create a delicious topping.
- Apple muffins and bread: Grated or diced Honeycrisp apples can be added to muffin and quick bread batters, adding moisture, natural sweetness, and a touch of tartness to the final baked product.
- Apple tarts and galettes: Honeycrisp apples can be elegantly showcased in tarts and galettes, where their slices are artfully arranged on top of a pastry crust and baked to perfection.
- Stuffed baked apples: The firm texture of Honeycrisp apples makes them an ideal choice for stuffed baked apples. Hollowed out apples can be filled with your favorite stuffing, such as brown sugar, nuts, and dried fruit, and then baked until tender.
Honeycrisp apples offer a superb combination of flavor and texture that can elevate your baking projects to a new level. When working with this versatile fruit, remember to consider its unique attributes and how they can complement other ingredients in your recipes. Embrace the delicious potential of Honeycrisp apples, and enjoy the tasty results!
Apple Baking Basics
Learn about the essentials in baking with honeycrisp apples, including how to properly peel, core, and slice apples.
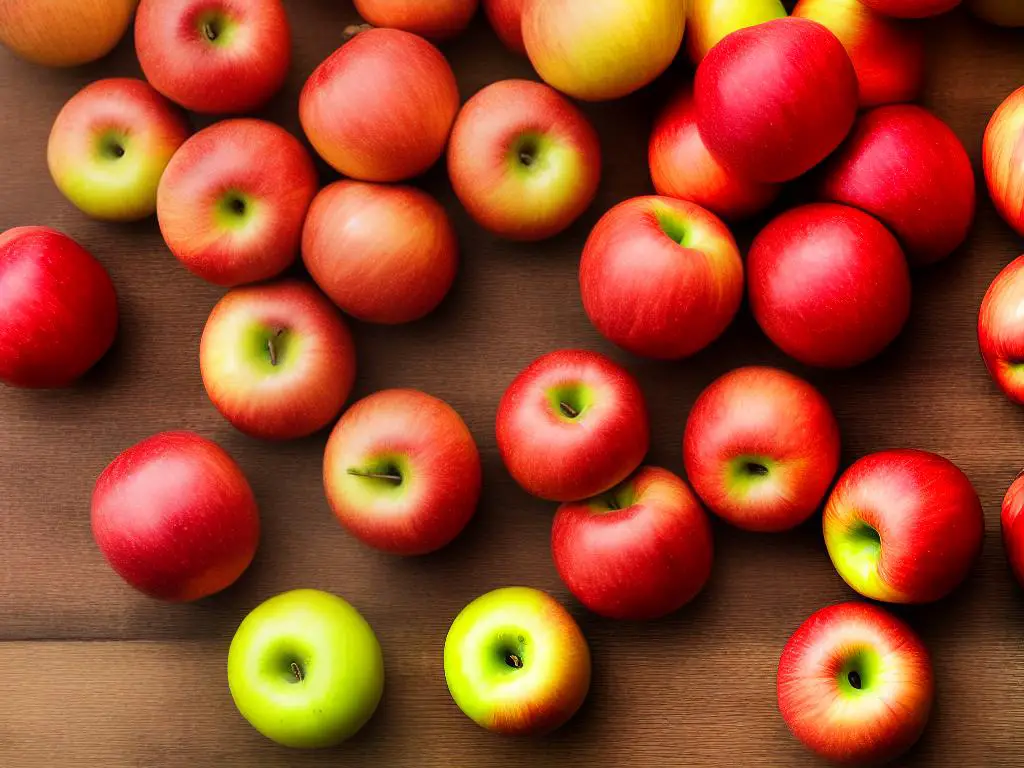
Choose the right apples
For baking, honeycrisp apples are an excellent choice. They are sweet, crunchy, and hold their shape well during the baking process. Make sure to choose apples that are firm, free of blemishes, and without any soft spots.
Wash the apples
Before starting, rinse the apples thoroughly under cool running water to remove any dirt, pesticides, or wax coatings. Pat them dry with a clean towel or paper towel.
Peel the apples
Using a vegetable peeler or a paring knife, carefully peel the skin off of each apple. Make sure to remove any small brown spots as well. Peeling apples is optional, as some recipes may call for leaving the skin on for added texture and color.
Core the apples
To remove the core, you can use an apple corer or a paring knife. If using an apple corer, simply push it through the center of the apple and twist to remove the core. If using a knife, cut off the top and bottom of the apple and stand it upright on a cutting board. Then, use the knife to slice around the core, being careful not to cut into the fruit.
Slice the apples
Once the core has been removed, you can slice the apples according to your recipe’s requirements. For most baking recipes, the slices should be about 1/8 to 1/4-inch thick. You can either cut the apple into wedges or into thin slices. Remember to work quickly, as apples tend to brown when exposed to air. To prevent browning, you can place the apple slices in a bowl of cold water mixed with a little lemon juice.
Choosing the right recipe
Honeycrisp apples are perfect for various apple dishes, including apple pie, apple crisp, apple turnovers, and baked apple slices. Be sure to choose a recipe that highlights the natural sweetness and crispness of honeycrisp apples.
Prepare the ingredients
Once you have your recipe, gather all the required ingredients and measure them according to the instructions. When baking with apples, typical ingredients include sugar, flour, butter, cinnamon, and nutmeg. However, each recipe may have its variations.
Prepare the baking dish
Depending on your specific recipe, you may need to grease or line a baking dish or pie tin with parchment paper. Preheat the oven according to the recipe’s instructions.
Assemble and bake
Follow the steps in your chosen recipe to combine your ingredients and arrange your peeled, cored, and sliced honeycrisp apples in the baking dish. Bake according to the instructions, ensuring that the apples are cooked through and tender.
Cool and serve
After baking, allow your apple dish to cool slightly before serving. Apple desserts are delicious when served warm and can be accompanied by a scoop of vanilla ice cream or whipped cream.
Baking with Honeycrisp Apples
Baking with Honeycrisp apples can be both fun and rewarding, as they are a delicious and versatile fruit for many recipes. Before you get started, it’s important to familiarize yourself with the necessary baking tools and equipment required for preparing apple-based dishes.
Necessary Baking Tools and Equipment
- Cutting board: It’s essential to have a flat, sturdy surface to chop and slice your apples on. A good-quality cutting board is a must to ensure safe and easy fruit preparation.
- Chef’s knife or paring knife: A sharp, durable knife will make peeling, coring, and slicing your Honeycrisp apples a breeze.
- Apple corer/slicer: This handy tool can make quick work of coring and slicing your apples into uniform pieces. If you don’t have one, using a knife will work just fine.
- Measuring cups and spoons: Accurate measurements are key to a successful baking experience, so make sure to have both dry and wet measuring cups as well as measuring spoons on hand.
- Mixing bowls: You’ll need various sizes of mixing bowls to combine your ingredients. Make sure they are large enough to accommodate all of your ingredients.
- Wooden spoon or silicone spatula: These tools are essential for mixing together your ingredients, as well as scraping the last bits of batter out of the bowl.
- Whisk: This simple tool can help you mix your dry ingredients together and incorporate air into your batter for a light and fluffy texture.
- Baking pan or dish: Depending on the apple-based recipe you choose, you’ll need an appropriate pan or dish. This could be a cake pan, pie dish, or sheet pan depending on what you’re making.
- Parchment paper or silicone baking mat: These non-stick surfaces prevent your baked goods from sticking to the pan and make for easy cleanup.
- Oven mitts and trivet: Safety first! Use oven mitts to protect your hands when handling hot bakeware, and a trivet to protect countertops and tables from hot pans or dishes.
- Cooling rack: Placing your baked goods on a cooling rack allows air to circulate around them for more even cooling.
- Pastry brush: A pastry brush is useful for glazing your apple-based baked goods with honey, syrup, or egg wash.
- Peeler: A reliable fruit peeler will save you time and effort when peeling your Honeycrisp apples.
Once you have all your baking tools and equipment organized and ready, you can confidently start creating delicious Honeycrisp apple-based recipes knowing you are well-prepared for the task! Happy baking!
Measuring and Mixing Instructions for Baking with Honeycrisp Apples
Before you begin, make sure you’ve gathered all the necessary ingredients, measuring cups/spoons, mixing bowls, and baking tools, like a whisk, spatula, or mixer. This will make the measuring and mixing process easier and more efficient.
Gather necessary ingredients and tools:
- Measuring cups/spoons
- Mixing bowl
- Baking tools
Use measuring cups for larger quantities of dry ingredients, such as flour and sugar. Spoon the ingredient into the measuring cup until it is slightly overfilled. Then, use a flat edge, like the back of a knife, to level off the extra ingredient and ensure an accurate measurement.
Measure dry ingredients:
- Flour
- Sugar
For liquid ingredients like milk and oil, use glass or plastic measuring cups with a spout. Pour the liquid in slowly until it reaches the desired measurement. When measuring sticky substances, such as honey or maple syrup, coat the measuring cup with nonstick spray or a thin layer of oil to make it easier to pour out.
Measure wet ingredients:
- Milk
- Oil
- Honey
- Maple syrup
Use measuring spoons for small amounts of ingredients, such as baking powder, baking soda, and spices. Fill the spoon with the ingredient and level it off with the back of a knife for an accurate measurement.
Measure small ingredients:
- Baking powder
- Baking soda
- Spices
Wash, peel, and core the Honeycrisp apples. Then, slice or dice the apples as your recipe requires. If the apples will be exposed to air for a while, toss them with a bit of lemon juice to prevent browning.
Prepping the apples:
- Wash
- Peel
- Core
- Slice or dice apples
When a recipe calls for mixing dry and wet ingredients, mix the dry ingredients together in one bowl and the wet ingredients in another bowl. When the dry and wet ingredients are thoroughly mixed in their respective bowls, combine them by gently folding the wet mixture into the dry mixture using a rubber spatula or a wooden spoon to avoid overmixing.
Mixing the ingredients:
- Combine dry ingredients in one bowl
- Combine wet ingredients in another bowl
- Fold the wet mixture gently into the dry mixture
After measuring the amount of sliced or diced Honeycrisp apples required for your recipe, gently fold them into the batter or dough with a rubber spatula or wooden spoon.
Measuring and mixing apples:
- Fold the Honeycrisp apples gently into the batter or dough
As you’re mixing ingredients, pay attention to the consistency of the batter or dough. Some recipes may require a smooth consistency, while others may be more chunky. Make sure to follow the recipe’s instructions for the correct consistency.
Be mindful of the consistency:
- Pay attention to the consistency of the batter or dough
- Follow the recipe’s instructions for the correct consistency
Don’t forget to preheat your oven to the required temperature before you begin baking. This will ensure that your baked goods cook evenly and to the correct doneness.
Preheat the oven:
- Preheat oven to the required temperature.
Depending on the recipe, you may need to grease, line with parchment paper, or flour a baking dish or pan. Follow the instructions in your recipe to ensure your baked goods easily release from their cooking vessel.
Prepare your baking dish or pan:
- Grease
- Line with parchment paper
- Flour
Following these measuring and mixing tips will help ensure that your Honeycrisp apple baked goods come out perfectly every time. Enjoy the process and happy baking!
Classic Honeycrisp Apple Recipes: Apple Pie, Crisp, and Cobbler
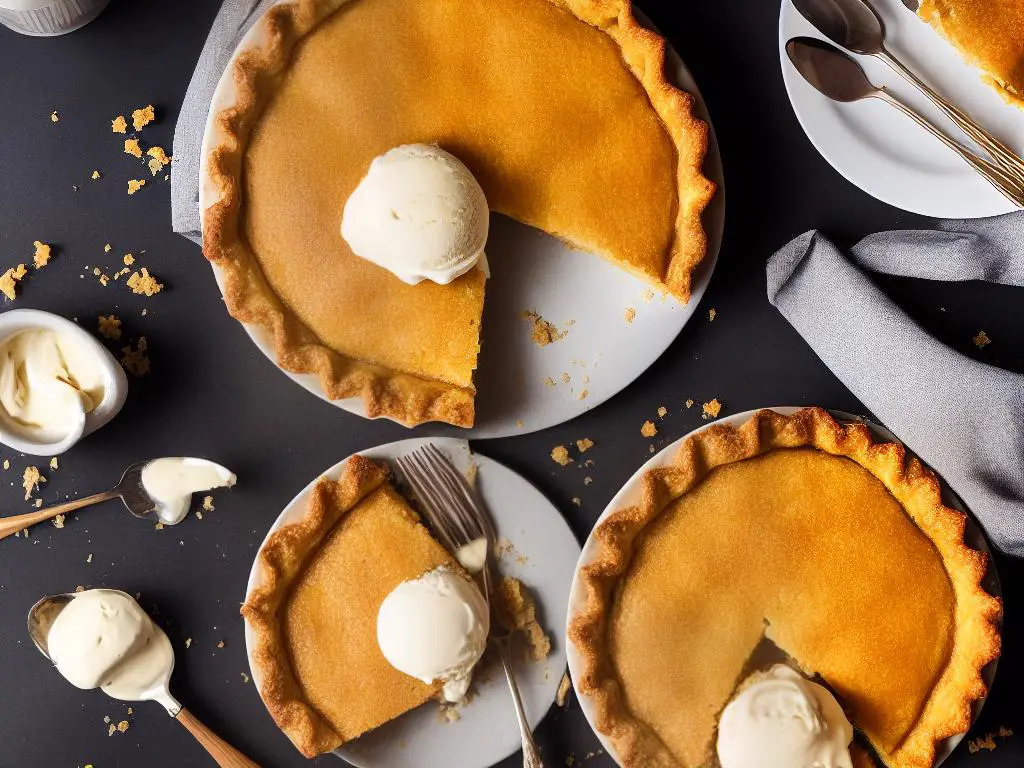
Honeycrisp Apple Pie
Ingredients:
- 6 cups thinly sliced Honeycrisp apples (about 5-6 apples)
- 1 tablespoon lemon juice
- 3/4 cup granulated sugar
- 1/4 cup all-purpose flour
- 1/2 teaspoon ground cinnamon
- 1/4 teaspoon ground nutmeg
- 1/4 teaspoon salt
- 2 pre-made 9-inch pie crusts (or homemade)
- 1 tablespoon unsalted butter
Instructions:
- Preheat your oven to 425°F (218°C).
- Peel, core, and slice your Honeycrisp apples. Toss them with the lemon juice in a large bowl.
- In a separate bowl, mix together the sugar, flour, cinnamon, nutmeg, and salt. Sprinkle this mixture over the sliced apples and toss to coat them thoroughly.
- Lay one pie crust in the bottom of a 9-inch pie dish. Spread the apple mixture evenly on top of the crust.
- Cut the butter into small pieces and dot the apples with the butter.
- Cover the pie with the second crust, crimp the edges to seal it, and cut a few slits in the top to allow steam to escape during baking.
- Place the pie on a baking sheet to catch any drips, and bake it for 40-50 minutes, or until the crust is golden brown and the filling is bubbly. You may need to cover the edges with foil or a pie crust shield if they start to brown too quickly.
- Allow the pie to cool for a couple of hours before serving. Enjoy your Honeycrisp apple pie with a scoop of vanilla ice cream or a dollop of whipped cream.
Honeycrisp Apple Crisp
Ingredients:
- 6 cups chopped Honeycrisp apples (about 5-6 apples)
- 1 tablespoon lemon juice
- 3/4 cup granulated sugar
- 1 teaspoon ground cinnamon
- 1 cup all-purpose flour
- 1 cup old-fashioned oats
- 1 cup packed brown sugar
- 1/2 cup cold unsalted butter, cut into small pieces
Instructions:
- Preheat your oven to 375°F (190°C) and grease a 9×13-inch baking dish.
- In a large bowl, toss the chopped apples with the lemon juice, granulated sugar, and 1/2 teaspoon of cinnamon.
- Pour the apple mixture into the prepared baking dish and spread it out evenly.
- In a separate bowl, combine the flour, oats, brown sugar, and remaining 1/2 teaspoon of cinnamon. Add the cold butter pieces and cut them into the mixture using a pastry cutter, two forks, or your fingertips until the mixture resembles coarse crumbs.
- Sprinkle the crumb mixture evenly over the apples.
- Bake for 45-50 minutes, or until the topping is golden brown and the filling is bubbling.
- Allow the apple crisp to cool slightly before serving. Enjoy warm with a scoop of vanilla ice cream or a dollop of whipped cream.
Honeycrisp Apple Cobbler
Ingredients:
- 6 cups chopped Honeycrisp apples (about 5-6 apples)
- 1/3 cup granulated sugar
- 1 teaspoon ground cinnamon
- 1 1/2 cups all-purpose flour
- 1 1/2 teaspoons baking powder
- 1/2 teaspoon salt
- 1/2 cup unsalted butter, softened
- 1/2 cup granulated sugar
- 1 large egg
- 1 teaspoon vanilla extract
- 1/3 cup milk
Instructions:
- Preheat your oven to 350°F (175°C) and grease a 9×13-inch baking dish.
- Toss the chopped apples with 1/3 cup granulated sugar and 1 teaspoon cinnamon. Spread the apples in the prepared baking dish.
- In a small bowl, whisk together the flour, baking powder, and salt.
- In a separate large bowl, cream the softened butter and 1/2 cup granulated sugar until light and fluffy. Add the egg and vanilla extract, and mix until combined. Stir in the flour mixture and milk, alternating between each, in three additions. Mix until just combined.
- Drop spoonfuls of the batter evenly over the apples, gently spreading it to create an even layer.
- Bake the cobbler for 40-45 minutes, or until the topping is golden brown and a toothpick inserted into the topping comes out clean.
- Allow the cobbler to cool slightly, and then enjoy it warm with a scoop of vanilla ice cream or a dollop of whipped cream.

Creative Honeycrisp Apple Recipes
Honeycrisp Apple Pie
Ingredients:
- 6 cups thinly sliced Honeycrisp apples (about 4-5 medium apples)
- 1 unbaked 9-inch pie crust
- 1 unbaked pie crust for top
- 3/4 cup granulated sugar
- 1/4 cup all-purpose flour
- 1/2 teaspoon ground cinnamon
- 1/4 teaspoon ground nutmeg
- 1/4 teaspoon salt
- 2 tablespoons unsalted butter, cut into small pieces
Instructions:
- Preheat oven to 425°F.
- In a large bowl, combine sliced apples, sugar, flour, cinnamon, nutmeg, and salt. Toss to coat apples evenly.
- Arrange the apple mixture into the unbaked 9-inch pie crust.
- Dot the top of the apples with the small butter pieces.
- Cover with the top pie crust, sealing and crimping edges as desired.
- Cut several small slits in the top crust for venting.
- Bake for 40-45 minutes, or until the crust is golden brown and apples are tender. Allow the pie to cool completely before cutting and serving.
Honeycrisp Apple Bread Pudding
Ingredients:
- 4 cups cubed day-old bread (preferably brioche or challah)
- 1 1/2 cups chopped Honeycrisp apples
- 1/4 cup raisins (optional)
- 3 large eggs
- 2 cups whole milk
- 3/4 cup granulated sugar
- 1 teaspoon vanilla extract
- 1/2 teaspoon ground cinnamon
- 1/4 teaspoon ground nutmeg
- 1/4 teaspoon salt
- Powdered sugar for dusting (optional)
Instructions:
- Preheat oven to 350°F and grease an 8-inch square baking dish.
- In a large bowl, combine bread cubes, chopped apples, and raisins.
- In another bowl, whisk together eggs, milk, sugar, vanilla, cinnamon, nutmeg, and salt.
- Pour the egg mixture over the bread mixture and stir gently until well combined. Let the mixture sit for about 10 minutes, so the bread can absorb the liquid.
- Transfer the mixture to the prepared baking dish and bake for 40-45 minutes, until golden brown and set in the center.
- Allow the bread pudding to cool slightly before dusting with powdered sugar, if desired, and serving warm.
Honeycrisp Apple Crisp
Ingredients:
- 4 cups peeled and sliced Honeycrisp apples
- 1 tablespoon lemon juice
- 3/4 cup packed brown sugar
- 1/2 cup all-purpose flour
- 1/2 cup old-fashioned rolled oats
- 1 teaspoon ground cinnamon
- 1/4 teaspoon ground nutmeg
- 1/4 teaspoon salt
- 1/2 cup cold unsalted butter, cut into small pieces
Instructions:
- Preheat oven to 375°F.
- In a 9-inch baking dish, combine apples and lemon juice, tossing to coat.
- In a medium bowl, combine brown sugar, flour, oats, cinnamon, nutmeg, and salt.
- Cut in butter with a pastry blender or fork until the mixture resembles coarse crumbs.
- Sprinkle this crumb mixture evenly over the apples.
- Bake for 35-40 minutes, or until apples are tender and topping is golden brown. Allow the crisp to cool slightly before serving warm, preferably with a scoop of vanilla ice cream.
Honeycrisp Apple Salad
Ingredients:
- 2 medium Honeycrisp apples, cored and chopped
- 4 cups mixed greens
- 1/2 cup crumbled feta or goat cheese
- 1/2 cup chopped walnuts or pecans
- 1/4 cup dried cranberries
- Balsamic vinaigrette dressing, to taste
Instructions:
- In a large salad bowl, combine mixed greens, chopped apples, crumbled cheese, nuts, and dried cranberries.
- Drizzle with balsamic vinaigrette dressing, to taste, and toss to combine.
- Serve the salad immediately as a refreshing and flavorful addition to your meal.
Healthy and Gluten-Free Baking with Honeycrisp Apples
Honeycrisp apples are not only delicious and juicy, but they also offer various health benefits, and are a versatile ingredient in a wide range of recipes. In this guide, you will learn how to make two healthy, gluten-free baked treats using honeycrisp apples: Honeycrisp Apple Muffins and Honeycrisp Apple Crisp.
Recipe 1: Honeycrisp Apple Muffins
Ingredients:
- 2 large honeycrisp apples, peeled and diced
- 1 3/4 cups gluten-free flour blend
- 1/2 cup almond flour
- 1/2 cup coconut sugar or any granulated sweetener
- 2 teaspoons baking powder
- 1/2 teaspoon salt
- 1 teaspoon ground cinnamon
- 1/4 teaspoon ground nutmeg
- 1 cup unsweetened almond milk or any non-dairy milk
- 1/2 cup unsweetened applesauce
- 1/4 cup coconut oil, melted
- 1 teaspoon vanilla extract
Instructions:
- Preheat your oven to 375°F (190°C). Line a 12-cup muffin tin with paper liners or lightly grease with coconut oil.
- In a large mixing bowl, whisk together the gluten-free flour blend, almond flour, coconut sugar, baking powder, salt, cinnamon, and nutmeg.
- In a separate bowl, mix together the almond milk, applesauce, melted coconut oil, and vanilla extract.
- Add the wet ingredients to the dry ingredients and mix until just combined. Fold in the diced honeycrisp apples.
- Divide the batter evenly among the muffin cups, filling each about 2/3 full.
- Bake for 25-30 minutes or until a toothpick inserted into the center of a muffin comes out clean.
- Let the muffins cool in the tin for about 5 minutes, then transfer to a wire rack to cool completely.
Recipe 2: Honeycrisp Apple Crisp
Ingredients:
Filling:
- 5 cups sliced honeycrisp apples (about 4-5 large apples)
- 2 tablespoons coconut sugar or any granulated sweetener
- 1 tablespoon gluten-free flour blend
- 1 teaspoon ground cinnamon
Topping:
- 1 cup gluten-free rolled oats
- 1/2 cup almond flour
- 1/2 cup chopped pecans or walnuts
- 1/4 cup coconut sugar or any granulated sweetener
- 1/4 cup coconut oil, melted
- 1 teaspoon ground cinnamon
- 1/4 teaspoon salt
Instructions:
- Preheat your oven to 350°F (180°C). Grease a 9-inch square or round baking dish with coconut oil.
- In a large bowl, combine the sliced honeycrisp apples with the coconut sugar, gluten-free flour blend, and cinnamon. Mix well to ensure the apples are evenly coated. Transfer the apple mixture to the prepared baking dish.
- In a separate bowl, mix together the gluten-free rolled oats, almond flour, chopped pecans or walnuts, coconut sugar, melted coconut oil, cinnamon, and salt. Stir until well combined.
- Sprinkle the topping evenly over the apple mixture in the baking dish.
- Bake for 40-45 minutes, or until the apples are tender, and the topping is golden brown and crisp.
- Remove the apple crisp from the oven and allow it to cool slightly before serving.
Closing:
Now that you’ve learned how to bake healthy and gluten-free honeycrisp apple muffins and apple crisp, you can enjoy these delicious treats without guilt. Feel free to further tailor these recipes to your needs and preferences by experimenting with different gluten-free flour blends, sweeteners, and spices. Happy baking!
Storing and Freezing
Storing and Freezing Baked Goods with Honeycrisp Apples
To ensure that your baked goods made with Honeycrisp apples maintain their quality, follow these storing and freezing instructions:
Storing Baked Goods:
- Allow baked goods to cool completely: Before storing your Honeycrisp apple baked goods, let them cool completely on a wire rack to room temperature. This will prevent condensation from forming inside the storage container, which can lead to soggy or moldy baked goods.
- Choose the right container: Select an airtight container or resealable plastic bag for storing your baked goods. Make sure the container is large enough to hold the baked goods without squishing them, but not so large that there is a lot of empty space, which can promote staleness.
- Layer with parchment paper: If you’re storing multiple layers of baked goods like cookies, bars, or slices of cake, place parchment paper between each layer to prevent them from sticking together.
- Store at room temperature: Store your Honeycrisp apple baked goods in a cool, dry place at room temperature such as a pantry or cupboard. Avoid storing them near sources of heat or moisture.
- Keep timing in mind: Most baked goods will maintain their quality for 2-3 days when stored properly at room temperature. However, certain baked goods made with Honeycrisp apples, like pies or crisps, may be best consumed within 1-2 days.
Freezing Baked Goods:
- Cool and wrap: Just like with storing, allow your baked goods to cool completely before freezing. Once cooled, wrap each individual item or portion in plastic wrap, making sure to cover the entire surface of the baked good to prevent freezer burn.
- Use a freezer-safe container: Place the wrapped baked goods in an airtight, freezer-safe container or a resealable plastic freezer bag. If you’re freezing multiple layers, use parchment paper between layers to keep the baked goods from sticking together.
- Label and date: Label your container or resealable bag with the type of baked good and the date you are freezing it. This will help you keep track of how long the baked goods have been in the freezer and make it easier to identify which items are best eaten first.
- Freeze: Place your container or resealable bag in a flat, level position in your freezer for optimal freezing. Make sure the area of the freezer where you’re placing your baked goods is not overcrowded to ensure even freezing.
- Keep timing in mind: Most baked goods can be frozen for up to three months, although it’s best to enjoy them within one month for optimal freshness. Pies and other baked goods with a higher moisture content should be consumed within a shorter time frame, typically within one month.
- Thawing and reheating: When you’re ready to enjoy your frozen Honeycrisp apple baked goods, remove them from the freezer and let them thaw at room temperature for a few hours or overnight, depending on the size of the baked good. For items like pies or crisps, you may want to reheat them in the oven at a low temperature (about 350°F) for a few minutes to regain their crispiness and warmth.
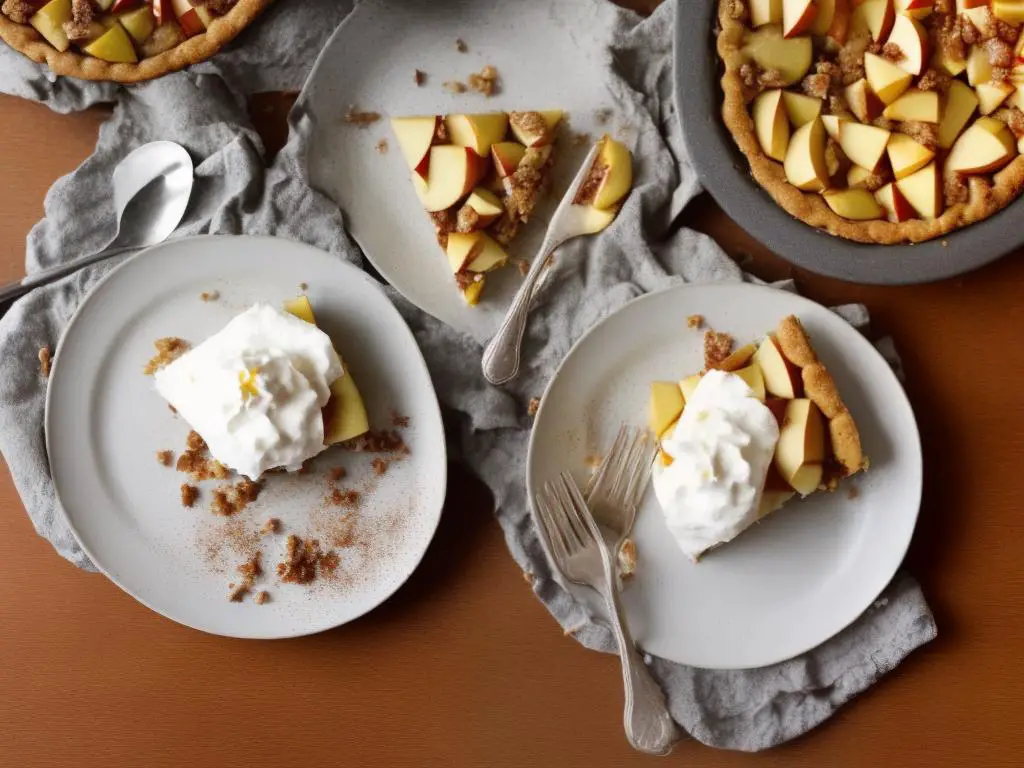
Presentation and Plating: Master the Art of Presenting Your Honeycrisp Apple Baked Goods
When it comes to baked goods, especially those with the sweet and tangy flavors of Honeycrisp apples, presentation and plating is essential for making your creations truly stand out. A visually appealing presentation can elevate your baking skills and impress your friends, family, or any lucky taste tester. Follow these simple steps to beautifully present your Honeycrisp apple baked goods and create an unforgettable dining experience.
Materials:
- Honeycrisp apple baked goods (pies, tarts, turnovers, etc.)
- Plates (ceramic or glass, neutral colors preferred)
- Placemats or table linens
- Utensils (cake server, pie cutter, tongs)
- Cake stands, tiered dessert trays, or other serving pieces
- Whipped cream or ice cream, for garnish
- Powdered sugar or cinnamon, for dusting
- Mint leaves or edible flowers, for additional garnish
Step 1: Prepare your workspace
- Ensure your work area is clean and uncluttered.
- Select a table linen or placemat that complements the colors of your baked goods.
- Set out plates, utensils, and serving pieces, making sure each item is clean and polished.
Step 2: Make your Honeycrisp apple baked goods the star
- Choose a neutral-colored plate as a canvas to showcase your baked goods. Whites, creams, and grays work well to emphasize the golden-brown hues of your treats.
- Use cake stands, tiered dessert trays, or other serving pieces to create height and dimension on your table. This will draw attention to your delicious Honeycrisp apple creations.
Step 3: Garnish and add finishing touches
- Dust the edges of your baked goods with powdered sugar or cinnamon for a touch of elegance.
- Add a dollop of whipped cream or a scoop of ice cream to your plated dessert for extra indulgence and improved taste.
- Consider adding a few mint leaves or edible flowers as garnish to enhance the visual appeal even further.
- Use a cake server, pie cutter, or tongs to neatly transfer a portion of your Honeycrisp apple dessert onto a plate for each guest. Take care to maintain the integrity and appearance of each piece.
Step 4: Add an element of surprise (optional)
- If you want to go the extra mile, consider serving individual portions of your Honeycrisp apple baked goods in unexpected ways, such as in glass jars or on small wooden cutting boards.
Step 5: Enjoy and share your Honeycrisp apple masterpiece
- Be proud of your beautiful presentation, and encourage your guests to snap photos and share them on social media if you desire.
- Ultimately, enjoy your expertly plated and impeccably presented Honeycrisp apple baked goods with friends and family!
In Conclusion:
With some thoughtful preparation and attention to detail, you can easily master the art of presenting your Honeycrisp apple baked goods in a visually appealing and impressive manner. Keep practicing and experimenting with different techniques and elements, and soon you’ll be known as the go-to dessert guru among your social circles. Happy baking and bon appétit!