
American apple pie is not just a dessert, it’s a symbol of tradition, hospitality, and homely comfort. Preparing this quintessential dish, though, is more than just following a recipe- it involves understanding the ingredients, their role, and applying some expert techniques. Our discussion here pertains to choosing the best apples for pie, pre-cooking them to bring out their flavor, creating a rich, flaky crust, and finally compiling and baking the pie to perfection. So, fasten your apron and get ready for an enlightening journey through the world of apple pie.
Choosing and Pre-Cooking Apples
“Piecing Together the Perfect Apple Pie: The Top Apples and Pre-Cooking Techniques to Try”
In the grand culinary universe, embracing an assortment of flavors and techniques is part of the joy of the journey. One perfect example is the classic apple pie. Getting it absolutely right, though, entails knowing the perfect apples to use and how to pre-cook them beforehand.
First, let’s delve into delving into the most suitable apples for pie. The beauty of this fruit is its range in flavor from sweet to tart and its variety of textures. The finest pies balance both of these elements by combining different apple varieties.
- The Granny Smith apple is a quintessential choice for pie enthusiasts due to its tartness. This firm-textured apple holds up well under the intense heat of baking and beautifully balances the sweetness of the pie filling.
- Braeburn apples offer a combination of sweet and tart flavors with a firm texture that works well in a baked pie. Its natural tanginess means less need for additional lemon juice often required in pie recipes.
- Honeycrisp blends sweetness and slight tartness with a crunchy texture withstanding baking temperatures. Their natural juiciness may require a little extra thickening agent, like flour or cornstarch.
Now that the choice of apples is clear, onto the business of pre-cooking. This is a process that isn’t typically necessary for all pies, but enthusiasts find it a secret weapon in the quest for perfect apple pie.
The simple idea behind pre-cooking apples is to burn off excess water content before the apples ever enter the pie shell. By sautéing or parboiling, the apples soften, allowing for a shorter bake time in the pie shell. This results in a well-structured pie, preventing a gap from forming between the filling and the crust, a scenario that haunts many a pastry-lover’s dreams.
Pre-cooking is simple. Once the apples are peeled and cut into chunks or slices, they can be tossed into a large pan over medium heat with a pat of butter. Stir them occasionally until they’re just softened. If parboiling, just bring a pot of water to boil, add your apples, and cook for about 2-3 minutes before draining.
So, whether you’re as tart as a Granny Smith, or as balanced as a Braeburn, or as sweet as a Honeycrisp, there’s an apple variety perfect for your pie. With the right choice of apples and pre-cooking techniques, the prospects of perfecting that apple pie are as bright as ever. Enjoy the quest, and, oh, the aroma of apples tenderly bubbling away will make your kitchen smell like a sweet slice of heaven. Isn’t that reason enough to bake an apple pie today?
Creating the Perfect Crust
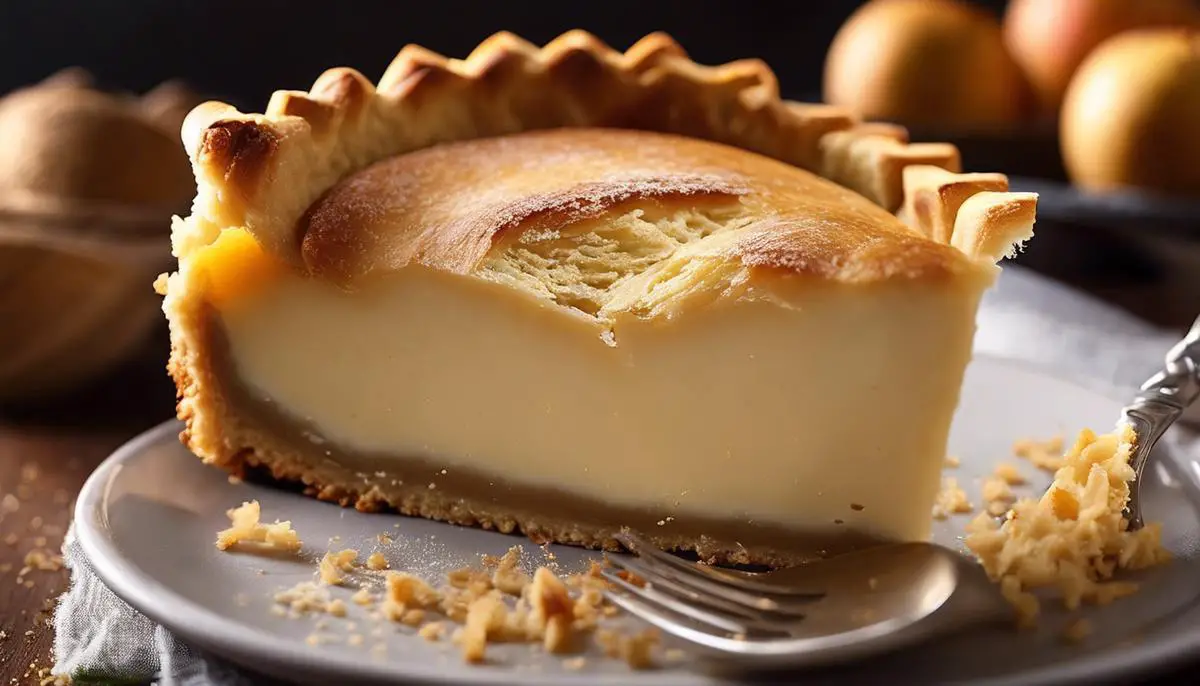
Achieving flaky, tender, buttery crust is arguably the pie pinnacle, the holy grail of baking. Beyond the perfect apples, the crust is often overlooked, but it’s equally crucial to the symphony of tastes that puts a smile on your face when you take your first bite. Here’s how to create a show-stopper of a pie crust, flaky, delicious, and almost as good as grandma’s.
Ice, Ice, Baby – secrets are often chilling
Pay attention, home bakers. One of the most vital secrets to the perfect pie crust is temperature – it’s all about keeping things chilly. Coldness inhibits the development of gluten in flour and aids in creating those flakes we all cherish. When it comes to your ingredients, cold is key; use cold water, chill your fat, and even consider popping your bowl in the fridge before you get started.
Mix It Up – fat and flour are friends
The type of fat you use can change the texture of your pie crust. Butter, with its fantastic flavor, yields crusts that are flaky in nature. Shortening, while less flavorful, can give you a crust that’s tender and easier to shape. For a balance of flakiness and flavor, consider using a half-and-half mix of butter and shortening.
When combining your fat and flour, don’t overdo it. You want to retain some small pieces of fat – these small fat pockets will melt during baking and leave behind delicious, flaky layers.
Water You Waiting For? – All the right amounts
Adding in the water is the next critical step. Remember, just as with the fat, keep it cold! Add water little by little, it’s necessary to bring the dough together but too much can lead to a tough crust. Enough water to make the dough bind together when pressed, but not so much that it becomes sticky, is the desired amount. The result should be a dough that’s soft but holds together well.
On a Roll – shaping your crust
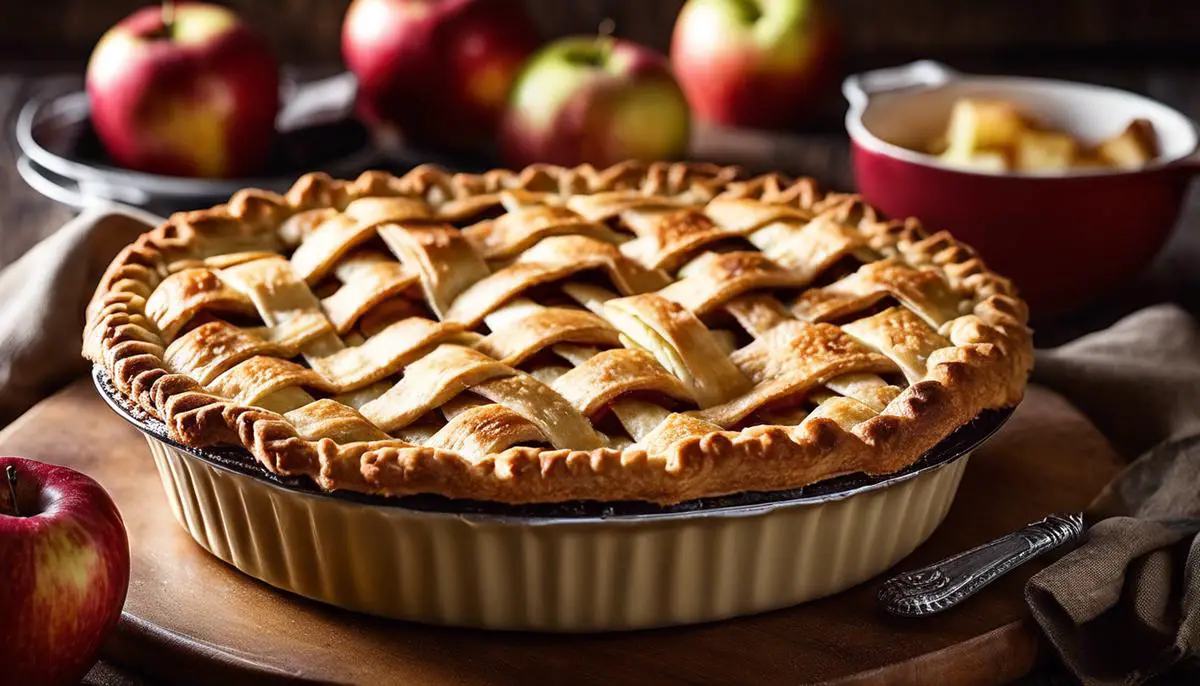
Now we’re ready to roll. Literally. A cool, floured surface is your canvas here. Gently roll out your dough, turning it often and ensuring it doesn’t stick to your surface. Aim for an even thickness, about 1/8th of an inch. Once done, gently fold it into quarters, place it into your pie pan, and lovingly shape it to fit. Crimp the edges for that classic look and your pie is ready to be filled with your favorite recipe.
Put to the Test – Blind Baking
Depending on your pie filling, you might want to consider pre-baking or ‘blind baking’ your crust. It’s a simple technique of partially or fully baking the crust before adding the filling. This method prevents soggy bottoms and ensures your crust will be beautifully browned and flaky, even with a moist filling.
Exploring the world of pie baking is an adventure filled with sweet (and savory) rewards. The process of making a crust might seem daunting, but it’s definitely worth it. Whether you’re prepping for a grand feast or just want a cozy dessert at home, these simple and tested tricks are bound to elevate your pie game.
Give it a crack, make a mess, make memories, and above all, make a fantastic, flaky, lip-smacking-good pie crust. The art of pie making is a culinary journey worth embarking upon, and the gift of a homemade pie is one that keeps on giving…one delicious bite at a time. Enjoy the process, and most importantly, enjoy the pie. Nothing beats the pure delight of homemade pie, straight from the heart and the oven.
Assembling and Baking the Pie
Mastering the Ultimate Pie: Assembly and Baking to Perfection
After selecting your apples and carefully crafting your pie crust, it’s time to embark on the next thrilling stage: assembling and baking. This part of the process is typically infused with an inexplicable level of anticipation. It’s that moment where everything converges, waiting to transform into a scrumptious dessert worth every bit of your culinary effort.
In pie crafting, the sublime blend of beautifully pre-cooked apples gently tucked into a well-made crust is a journey unto itself. Connecting these delicately prepared components requires careful planning, though. Ready your space, make sure every item – be it baked apples, crust, or egg washes – is at your arm’s length, and keep those hands clean and ready.
Splash your flour out on your workspace when rolling your dough. Half of pie baking is undoubtedly about instinct, but maintaining the right thickness of your crust isn’t just a knack but a necessity. Try to keep it even and around a quarter-inch thick for the ideal bite.
Your crust should be larger than your pie dish, allowing you ample dough to carefully crimp and create that visually stunning, flavor-locking edge. If the dough tears or breaks, wet your fingers slightly and delicately patch it. In pie-making, imperfections are merely opportunities in disguise!
The crust is more than just a shell; it’s an integral part of the overall taste experience. Hence, to prevent the pie base from getting soggy, it’s advisable to brush it lightly with an egg wash or even a thin layer of preserves (like apricot) before adding the filling. It forms a barrier, minimizing the juice-soaked crust phenomenon we all dread.
On to filling your pie. Distribute your pre-cooked apples evenly across the base for consistency in every bite. If you’re feeling creative (and why wouldn’t you?), you can layout the fruit in a spiral pattern or any presentation that pleases the eye. Be generous; your pie should be stout, not slumping!
Cover the assembly with the top crust straight from your fridge or freezer. Cold dough is easier to handle and ensures your crust doesn’t lose its shape. Once capped, trim any overhanging dough and crimp the edges to seal in the taste. Finally, slice a few vent holes on the upper crust to let excess steam escape, preventing it from turning soggy.
Before venturing into the oven, one universal tip to aspire towards a golden-brown finish is to brush your dough with a bit of cream or an egg wash. For an extra pop of sweetness and a lovely crunch, sprinkle a dash of granulated or coarse sugar on top.
Baking times and temperatures vary based on your oven and the size of your pie, but a tentative guide is to bake at 375°F to 400°F for about 50 minutes. Watch for a crust that has turned a pleasing color and juices that bubble. When in doubt, remember – it’s better to overbake than underbake!
As excruciating as it may sound, allow your pie to cool completely before slicing into it. This resting period gives the filling time to set and makes for cleaner slices.
The exhilaration of biting into a slice of homemade apple pie is unparalleled, so why limit such an experience to special occasions? Let’s redefine norms and whip up pies that feed not just our stomachs, but also our souls and the bonds we share. Happy baking, fellow food enthusiasts!

As we journeyed through the best apples for pie-making, the delicate process of pre-cooking, creating the perfect crust, and exciting pie assembly techniques, you’ve gained valuable knowledge to make your homemade apple pie stand out. Crafting the perfect American apple pie is an art, and with these insights, you are now well-equipped to create this beloved dessert. So, roll up your sleeves and embrace the challenge of baking an apple pie from scratch. The aroma of freshly baked homemade apple pie is truly a reward like no other!
