
Growing an apple tree in your garden is not only rewarding for the fruit it produces, but also for the beauty and structure it adds to your outdoor space. With a variety of apple trees available, understanding the differences, care, and management techniques is essential for the success of your home orchard. In this guide, you will learn about the apple tree varieties, planting process, care, pruning, pest and disease management, harvesting, companion planting, and grafting and propagation.
Understanding Apple Tree Varieties
Growing an apple tree can be a rewarding and enjoyable experience, but it’s important to understand the different varieties of apple trees and their ideal growing environments. In this guide, you’ll learn about the types of apple trees available, the differences between dwarf, semi-dwarf, and standard apple trees, and how to choose the right variety for your needs.
Types of Apple Trees:
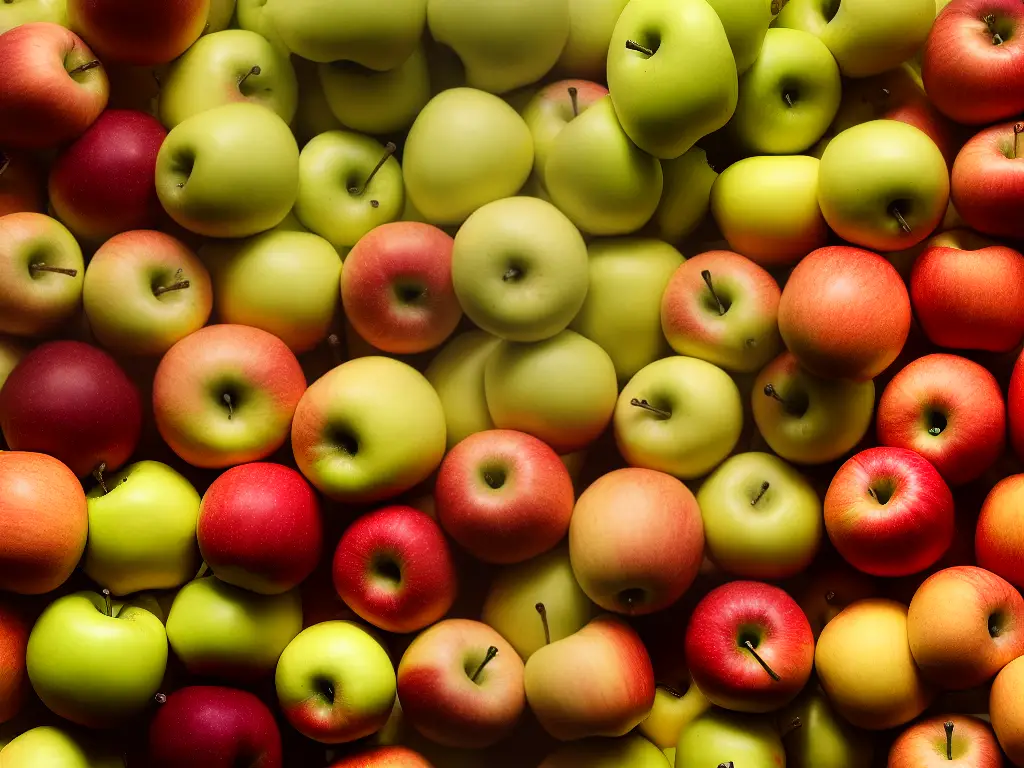
There are over 7,500 varieties of apple trees, but they can be broadly categorized into dessert apples, cooking apples, and cider apples. Dessert apples are typically sweet and juicy, while cooking apples have a more tart flavor and hold their shape when cooked. Cider apples are grown specifically for making apple cider.
Some popular apple tree varieties include:
- Red Delicious
- Golden Delicious
- Granny Smith
- Gala
- Fuji
- Honeycrisp
- McIntosh
Ideal Growing Environments:
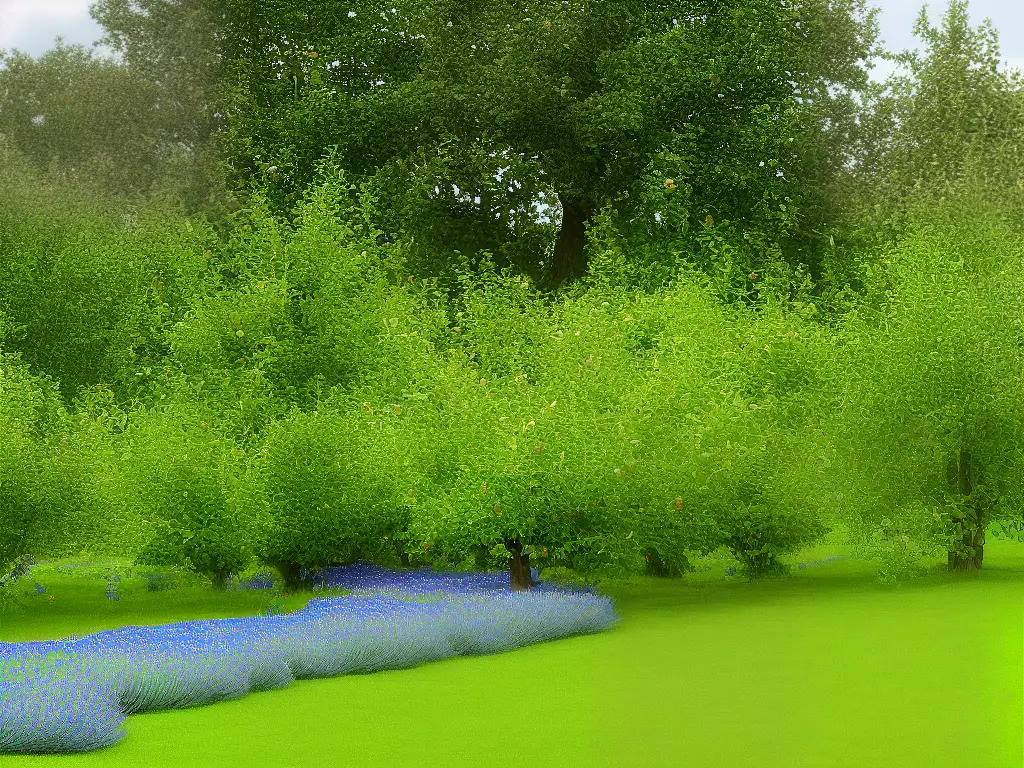
Apple trees thrive in temperate climates with cold winters and warm summers. They need at least 6 hours of sunlight daily and well-draining soil. Additionally, apple trees require a certain amount of cold temperatures, called chill hours, to properly develop fruit. This requirement varies from 200 to 1,200 chill hours, depending on the variety. It’s essential to choose a variety suited to your climate and the number of chill hours it will receive.
Dwarf, Semi-Dwarf, and Standard Apple Trees:
a. Dwarf Apple Trees: Dwarf apple trees reach a mature height of 8 to 10 feet, making them perfect for small spaces or container gardening. They generally produce fruit within 3 to 4 years of planting and require less pruning compared to taller varieties. However, dwarf apple trees may have a shorter lifespan and often need staking for support.
b. Semi-Dwarf Apple Trees: Semi-dwarf apple trees can grow up to 12 to 15 feet tall and are more disease-resistant than dwarf varieties. They produce fruit within 4 to 5 years of planting and require moderate pruning. Semi-dwarf apple trees are suitable for a slightly larger space and can also be grown in large containers.
c. Standard Apple Trees: Standard apple trees can tower up to 20 to 30 feet in height and have deep root systems. They take longer to bear fruit, usually between 5 to 8 years after planting, but can live for many years, sometimes over a century. Standard apple trees require regular pruning and need ample space in your yard to grow.
Choosing the Right Variety:
When choosing a variety of apple tree for your garden, consider the following factors:
- Climate: Make sure the variety is suitable for your region’s climate and number of chill hours.
- Space: Consider the available space in your yard and the mature height of the tree.
- Pollination: Most apple tree varieties are not self-pollinating, so you might need to plant two or more different varieties to ensure cross-pollination and fruit production.
- Disease resistance: Some apple tree varieties are more resistant to common diseases, such as apple scab and powdery mildew, than others.
- Fruit usage: Decide whether you want an apple tree for eating, cooking, or making cider, and choose a variety accordingly.
Conclusion: When it comes to growing apple trees, understanding the different varieties and their ideal growing environments is key to ensuring a successful harvest. By considering your climate, available space, and desired apple usage, you can choose the right variety and type (dwarf, semi-dwarf, or standard) to flourish in your garden. With proper care and attention, you’ll be enjoying delicious apples from your own tree in no time.
Planting an Apple Tree
1. Selecting a healthy apple tree:
- Visit a local nursery or garden center and select a healthy apple tree sapling that is ideally 1-2 years old.
- Choose a variety that is suited to your climate and growing conditions.
- Opt for a sapling that has a good root system, with no signs of disease or damage.
2. Choosing the best location for planting:
- Apple trees require full sunlight for optimal growth, so select a site that receives at least 6-8 hours of direct sunlight per day.
- Ensure the location has well-draining soil to prevent root rot.
- Avoid planting near other trees or structures, as apple trees need ample space to grow and spread their roots.
3. Preparing the soil:
- Conduct a soil test to determine the pH level and nutrient content of your soil. Apple trees prefer slightly acidic soil, with a pH between 6.0 and 6.5.
- Amend the soil with organic matter, such as compost or well-rotted manure, to improve its fertility and drainage. This should be done a few weeks before planting to allow the soil to settle.
- Remove any weeds or grass from the planting area to reduce competition for nutrients and water.
4. Planting the apple tree:
- Dig a hole that is twice the width and the same depth as the root ball of your sapling. This will allow the roots to spread easily.
- Carefully remove the sapling from its container or burlap, taking care not to damage the delicate roots.
- Position the tree in the center of the hole, ensuring that the graft union (the point where the fruiting variety was grafted onto the rootstock) is at least 2 inches above the soil line.
- Fill in the hole with the amended soil, gently pressing it down around the roots.
- Water the tree generously to help settle the soil and establish good root-to-soil contact.
5. Establishing proper support structures:
- Place a tree stake about 12 inches from the trunk, driving it into the ground until only about 1-2 feet remain above the soil level.
- Using a flexible tree tie, secure the trunk to the stake. This will provide stability and prevent the tree from toppling during strong winds or heavy fruit loads.
- Apply a layer of mulch around the base of the tree to conserve moisture, suppress weeds, and maintain consistent soil temperature. Keep the mulch a few inches away from the trunk to avoid rot.
6. Ongoing care:
- Water the tree regularly, especially during dry spells or periods of drought. Young trees require about 1-2 inches of water per week.
- Fertilize the tree in early spring and early summer with a balanced fruit tree fertilizer, following the package instructions.
- Prune the tree during its dormant season (late winter/early spring) to encourage healthy growth, good fruit production, and proper tree shape.
With proper care and attention, your apple tree should thrive and produce fruit for years to come. Enjoy the rewarding process of nurturing your tree and savoring the fruits of your labor!
Apple Tree Care
Growing an apple tree can be an excellent addition to your garden, providing both aesthetic appeal and fresh fruit harvest. This guide will help you learn the basic steps to successfully grow and care for your apple tree, including watering, mulching, fertilizing, and providing proper support and protection from extreme weather.
1. Planting the Apple Tree:
- Choose the right variety of apple tree for your climate and soil.
- Purchase a healthy, well-branched young tree from a reputable nursery.
- Plant the apple tree in a sunny spot with well-draining soil.
- Dig a hole twice the width and depth of the root ball of the tree.
- Place the tree in the hole and spread out the roots, ensuring the graft union (where the rootstock meets the stem) is above the soil line.
- Backfill the hole with soil, pressing it firmly around the roots to eliminate air pockets.
- Water thoroughly to settle the soil.
2. Watering:
- Water your apple tree regularly, especially during the first year and dry spells.
- Thoroughly soak the soil around the tree to a depth of at least 6-12 inches.
- Ensure the soil is always slightly moist, never allowing it to dry out completely or become waterlogged.
3. Mulching:
- Apply a layer of organic mulch, such as wood chips, bark, or compost, around the base of the tree, extending about 3-4 feet from the trunk.
- Keep the mulch 2-3 inches away from the tree trunk to prevent disease and rodent damage.
- Replenish the mulch as needed to maintain a 3-4 inch depth, which will help conserve soil moisture, regulate temperature, and suppress weeds.
4. Fertilizing:
- Perform a soil test in the area around your apple tree to identify any nutrient deficiencies.
- Apply a balanced slow-release granular fertilizer or organic alternative, such as compost or well-aged manure, to provide the necessary nutrients for healthy growth.
- Avoid over-fertilizing your apple tree, which can lead to excessive growth and susceptibility to pests and diseases.
- Generally, fertilize once in the early spring and again in mid-summer, following the product’s recommended application rate.
5. Pruning and Training:
- Prune your apple tree annually during the dormant season (late winter to early spring) to maintain a strong structure and encourage fruit production.
- Remove any dead, damaged, or diseased branches, along with any that cross or rub against each other.
- Train your apple tree to a central leader system, where one main trunk extends upward, with evenly-spaced branches radiating out horizontally.
- Use a pruning saw or hand shears to make clean, sharp cuts to minimize the risk of infection.
6. Providing Support:
- Young apple trees may need staking to provide support and maintain proper growth during the first few years.
- Use a sturdy wooden or metal stake, driving it into the ground about 12-18 inches away from the tree trunk.
- Secure the tree to the stake using soft, flexible material, such as tree ties or strips of cloth, allowing for slight movement but preventing damage.
7. Protection from Extreme Weather:
- Protect your apple tree from freezing temperatures by applying a layer of winter mulch, such as straw or leaves, around the base of the tree.
- If necessary, use tree wraps or plastic guards to protect the trunk from sunscald or frost cracks.
- Keep an eye on temperature fluctuations in late winter and early spring, as these can cause damage to flower buds and fruit.
- Consider providing temporary shade or using shade cloth during periods of extreme heat to prevent sunburn on leaves and fruit.
By following these apple tree care guidelines, you can grow a healthy and productive apple tree in your garden. Be patient, as it may take a few years for your tree to start bearing fruit. Once it does, enjoy the delicious and fresh apples straight from your backyard!
Pruning and Training Apple Trees
Pruning and training your apple tree are essential in ensuring optimal growth, fruit production, airflow, and overall tree health. Here is a step-by-step guide on how to prune and train your apple tree effectively:
- Understand the purpose of pruning: Pruning allows you to remove dead, damaged, or diseased branches, promote a strong structure, control size, and encourage better airflow and light penetration.
- Choose the right time to prune: The ideal time to prune apple trees is during late winter or early spring when the tree is dormant and has not yet begun to grow. Pruning during this time minimizes the risk of infection, as the tree can rapidly heal the cuts.
- Gather necessary tools: To prune your apple tree, you will need a sharp pair of bypass pruners, loppers, a pruning saw, and a ladder if the tree is tall.
- Prepare the tree for pruning: Remove any debris, snow or ice from around the tree to have a clear view of the branches.
- Start with the 3 D’s: Remove dead, damaged, and diseased branches. Cut all the way back to the trunk or another healthy branch to prevent further decay.
- Prune suckers and water sprouts: Suckers grow from the base of the tree while water sprouts grow vertically from other branches. Both can divert energy from fruit production. Cut them off at the base using bypass pruners.
- Thin out crowded branches: Ensure that there is sufficient space between the branches for light and air circulation. Remove crossing or competing branches that can potentially block sunlight or rub against each other.
- Train young trees: For a newly planted apple tree, aim to create a strong central leader (the main trunk) and a well-balanced scaffold branch system. Select 4-6 evenly spaced scaffold branches with wide angles (ideally 45-60 degrees) from the central leader. Remove any other branches.
- Maintain the tree’s shape: As the apple tree grows, it is crucial to maintain the overall structure. Continue pruning to encourage lateral growth, and guarantee that the higher branches are not shading the lower branches.
- Head back branches: Trimming the ends of branches can encourage new growth. Prune approximately 20-30% of the previous year’s growth by cutting just above an outward-facing bud.
- Clean up: After pruning, clean and sanitize your tools with rubbing alcohol or a solution of bleach and water. Dispose of all cut branches, dead leaves, and debris to prevent disease and pest problems.
- Monitor tree health: Regularly check your apple tree for signs of disease, pests, and growth. Address any issues promptly, and adjust your pruning and training methods accordingly to maintain a healthy and fruitful tree.
Keep in mind that every apple tree is unique, and pruning and training techniques may differ accordingly. As you gain more experience and become familiar with your tree’s growth habits, you will be better equipped to make informed pruning decisions and enjoy the rewards of a healthy, productive apple tree.
Pest and Disease Management
To successfully grow an apple tree and yield a healthy harvest of apples, you need to be aware of common pests and diseases that may affect your tree and learn how to manage them using organic or chemical methods. Here is a step-by-step guide to help you manage pests and diseases in your apple tree.
1. Know the common pests and diseases affecting apple trees.
Some common pests that may affect your apple tree include:
- Aphids
- Apple maggots
- Coddling moths
- Mites
- Japanese beetles
Some common diseases that may affect your apple tree include:
- Fire blight
- Apple scab
- Powdery mildew
- Cedar apple rust
2. Monitor your apple tree for signs of pests and diseases.
Regularly inspect your apple tree for any signs of pests and diseases. Look out for changes in leaf color, damage to leaves and fruits, presence of insects, or blackened or stunted growth.
3. Employ organic pest and disease management methods.
Using organic methods of pest and disease control can be highly effective in protecting your apple tree, and is safer for the environment. Some organic methods include:
- Encourage natural predators of pests such as ladybugs, lacewings, and beneficial nematodes in your garden.
- Use organic sprays like neem oil, insecticidal soap, or a homemade garlic or pepper spray to deter pests.
- Prune and thin out your apple tree to promote air circulation, reduce humidity, and minimize the chance of diseases.
- Regularly clean up fallen leaves and fruits, as well as any infected or dead branches, to reduce the spread of pests and diseases.
- Plant disease-resistant apple varieties if possible to minimize the risk of infections.
4. Use chemical methods when necessary.
If organic methods are not working and your apple tree is severely infested or infected, you may need to resort to chemical methods to protect your tree. Always follow the label instructions and use the chemicals judiciously to minimize environmental impact. Some chemical methods include:
- Use insecticides or acaricides to control pests like aphids, mites, and maggot flies. Consult your local nursery or garden center for the right product and application timing.
- Use fungicides to control diseases like apple scab, powdery mildew, and cedar-apple rust. Ensure proper timing and application as per the product’s label.
- Apply bactericides or antibiotics like streptomycin to control bacterial diseases like fire blight. Consult a professional or your local extension office for appropriate recommendations.
5. Maintain overall tree health.
A healthy apple tree will be better equipped to withstand and recover from pest and disease attacks. Provide your apple tree with the necessary nutrients, water, and pruning, and protect it from stress factors like frost or drought.
By implementing these pest and disease management practices, you can successfully grow and maintain a healthy apple tree in your garden and enjoy a bountiful harvest for years to come.

Harvesting and Storing Apples
Growing an apple tree is a rewarding experience that promises the delightful harvest of fresh, juicy apples. Knowing when your apples are ready for harvest, how to properly pick them, and storing them correctly can ensure that you get the most out of every apple from your tree. Here’s a step-by-step guide to help you become a pro at harvesting and storing your apples.
Step 1: Determine When Apples are Ready for Harvest
- Observe the color changes: Apples are usually ready for harvest when they’ve reached their full color. A green apple should have a uniform green shade on its exterior, whereas a red apple will have a vibrant red color. Some apples also undergo a noticeable shift from green to yellow or orange when they’re ripe.
- Check for firmness: A ripe apple will still be slightly firm to the touch and not mushy.
- Conduct a taste test: If you’re unsure whether the apple is ready for harvest, try picking one and tasting it. A ripe apple should have a sweet, juicy taste with a slight tang, depending on the variety.
Step 2: Picking Your Apples
- Pick apples by hand: To ensure that you don’t damage the tree or fruit, it’s best to pick apples by hand. Use a gentle, twisting motion while holding the apple in the palm of your hand, and carefully twist the apple off its stem.
- Use a picking basket: If you’re planning to harvest a significant number of apples, consider using a padded picking basket to minimize bruising and prevent the apples from falling.
- Start picking from the outside: Apples that are located on the outer branches of the tree will usually ripen first. Begin by picking these apples before moving inward.
- Avoid picking unripe apples with ripe ones: When harvesting, make sure that you only pick apples that are fully matured to prevent damage to the remaining unripe fruit that’s still on the tree.
Step 3: Storing Your Apples
- Store apples in a cool and dark place: The ideal storage temperature for apples is between 30-40°F (-1 to 4°C) with a 90% humidity. A cellar, garage, or refrigerator can make a suitable storage location.
- Use proper containers: Use plastic or cardboard containers with ventilation holes to store your apples. Line the containers with clean straw, shredded paper, or foam padding to help absorb any excess moisture and keep apples from touching one another.
- Sort apples by size: Larger apples ripen faster and can rot more quickly. Sort your apples by size and store larger apples separately from smaller ones. Remove any damaged or bruised apples, as they can cause rot to spread quickly among the other apples.
- Check for spoilage: Periodically inspect your stored apples for any signs of rot, mold, or pest infestation, and remove any affected apples immediately.
- Use within the appropriate timeframe: Depending on the variety and storage conditions, apples can be stored from several weeks to several months. Consume the apples within this timeframe to enjoy the best flavor and freshness.
Harvesting and storing apples can be a straightforward process when you know the right strategies. By following this guide, you can enjoy crisp, delicious apples from your tree throughout the season and share the bounty with friends and family. Happy harvesting!

Apple Tree Companion Planting
Companion planting is an excellent way of growing certain plants and flowers alongside apple trees. By doing this, you can create a harmonious and mutually beneficial environment, attracting pollinators, repelling pests, and providing additional nutrients.
Steps for Successful Apple Tree Companion Planting
- Choose the right location: Apple trees require full sunlight and well-drained soil to grow well. Choose a location with these requirements to ensure your apple tree and companion plants will thrive.
- Know your apple tree variety: Before planting, understand the specific needs and characteristics of your apple tree variety to ensure the companion plants you choose will be compatible.
- Plan the layout: Plan the placement of your companion plants around the apple tree, leaving enough space for the tree’s root system and allowing proper air circulation between the companion plants and the tree.
- Select beneficial plants and flowers: Choose plants and flowers that complement the apple tree’s needs and provide an abundance of beneficial qualities.
- Attract pollinators: Apple trees depend on insects, like bees, to pollinate their flowers, so it’s essential to select companion plants that attract pollinators, such as borage, lavender, or calendula.
- Repel pests: Some plants and flowers can naturally repel pests that may harm apple trees, like codling moth and apple scab. Choose companion plants with pest-repelling properties, such as nasturtium, chives, or marigolds.
- Provide additional nutrients: Certain companion plants like legumes (beans, peas) can enhance soil nutrients, while others like comfrey have deep roots that bring up nutrients from deep soil layers.
- Plant your apple tree and companions:
- Plant your apple tree according to its specific requirements, carefully following instructions provided by the nursery or included with the tree.
- Plant your chosen companion plants around the tree, based on the layout you planned earlier.
- Be mindful of the mature size of both the apple tree and companion plants to ensure they do not become overcrowded as they grow.
- Care for your apple tree and companion plants: Ensure both the apple tree and companion plants receive adequate water, sunlight, and nutrients. Prune your apple tree, and keep companion plants properly trimmed.
- Monitor and adjust: Observe the development of your apple tree and companion plants, making any necessary adjustments to the planting or care plan. This may include adding more companion plants, removing any that aren’t thriving or working well, or adjusting the watering and fertilization schedules.
Apple Tree Grafting and Propagation
Grafting apple trees is an excellent way to expand your home orchard and experiment with different apple varieties on the same tree. However, apple trees cannot be grown true from seeds; they must be propagated vegetatively by grafting or budding.
Step 1: Gather Necessary Materials
- A healthy young apple tree rootstock (1-2 years old)
- Scionwood (cuttings) from a desirable apple tree variety
- A sharp grafting knife or budding knife
- Grafting tape or rubber bands
- Tree wound dressing or grafting wax
Step 2: Select the Appropriate Grafting Technique
There are several grafting techniques that can be used, whip-and-tongue graft, cleft graft, and T-bud graft. For beginners, the whip-and-tongue graft is the simplest and most effective.
Step 3: Prepare the Rootstock and Scion
Cut the rootstock approximately 1/4 to 1/3 inch above a strong, outward-facing bud. Make a 1 to 1.5-inch long sloping cut on the rootstock. Select a healthy scion with several buds on it. Cut a matching sloping cut at the base of the scion, making sure it has the same angle and length as the cut made on the rootstock.
Step 4: Perform the Whip-and-Tongue Graft
Place the scion on the rootstock, aligning their cambium layers for a good contact. Make a small cut (the tongue) about halfway down both the rootstock and scion’s sloping cuts. The tongues should easily slide into each other when combined.
Step 5: Secure the Graft
Wrap grafting tape or a rubber band tightly around the graft union to hold the scion and rootstock together. Apply tree wound dressing or grafting wax to seal the graft area, preventing moisture loss and the entry of diseases or pests.
Step 6: Monitor the Graft
Gradually loosen the grafting tape or rubber band as new growth develops, to prevent constriction of the growing tree.
Step 7: Transplant the Grafted Apple Tree
After the graft has healed and the grafted scion has started growing into a new branch (usually 4-6 weeks after grafting), transplant the grafted tree to its final location in the orchard.
Overall, propagating and grafting apple trees ensures desirable attributes of a selected variety and facilitates exploration of different varieties on the same tree. Follow these steps to succeed in expanding your home orchard with the apple trees of your choice.
By acquiring knowledge about the diverse apple tree varieties, planting and caring for your tree, and understanding how to deal with pests and diseases, you’ll be well on your way to a bountiful harvest. Knowing when to harvest and store your apples, as well as incorporating companion plants and exploring grafting techniques, will further enhance your apple tree growing experience. Embrace the adventure and enjoy the fruitful rewards that come with growing and maintaining your very own apple tree.
