
For many, apple pie is a classic dessert that captures the essence of home-cooked comfort. There’s an art to creating a traditional apple pie – an art that involves selecting the perfect variety of apple, mastering the creation of a satisfyingly flaky crust, and understanding the precise temperature and time needed for baking. This exploration dives into the delights of crafting an apple pie recipe specifically tailored to the use of rippingly sweet Red Delicious apples, a variety renowned for its potential in pie-baking.
Choosing and Prepping Red Delicious Apples
Uncover the Secrets of Red Delicious Apples for a Scrumptious Pie
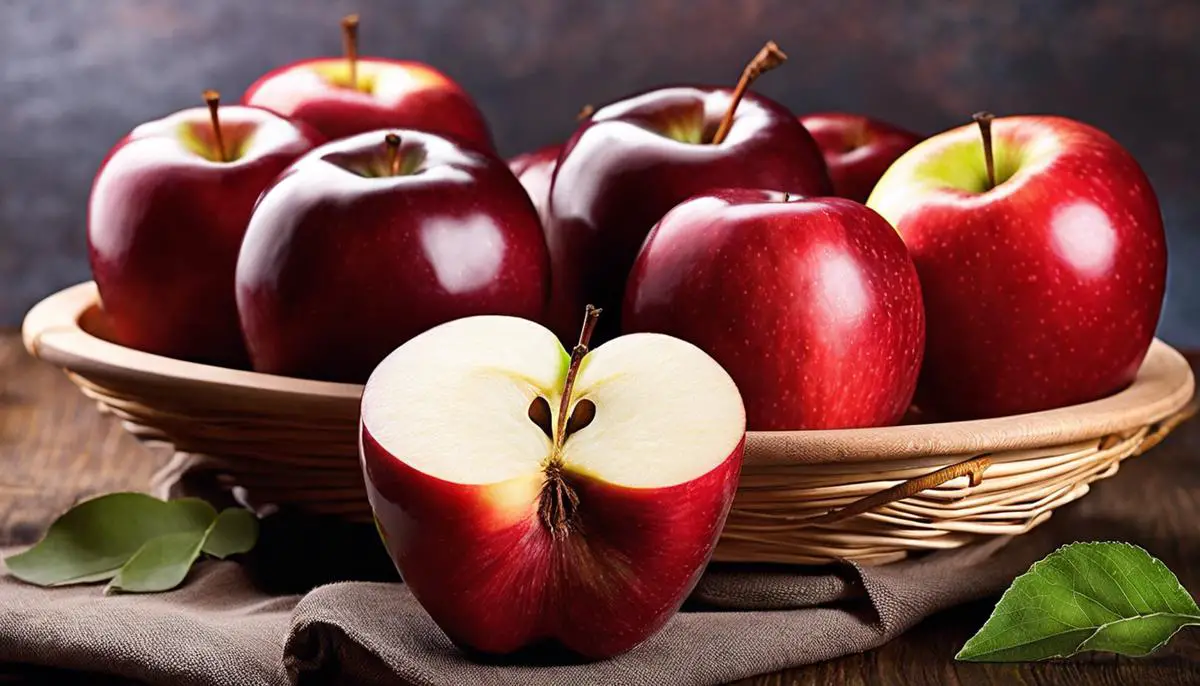
Venturing into the colorful world of cuisine leads us to all types of tantalizing treasures, ripe for exploration. One such culinary gem is the delightful simplicity of a home-baked apple pie. And no apple pie is complete without the star of the show – the apple. In this case, we’re focusing on the juicy wonder that is the Red Delicious. Nothing encapsulates the joy of oven-baked sweetness more than this classic choice of apple.
Choosing the Perfect Red Delicious Apple
Selection is critical when preparing a pie that sings with flavor. The question begs – what factors count when selecting Red Delicious apples?
- Firstly, take note of the appearance. A superb specimen for your pie-plucking venture should radiate a rich deep-red color and exude a firm texture with a slight give under gentle pressure. Dull coloration or wrinkles should set your ‘dud detector’ on high alert.
- An aroma akin to old childhood memories of apple picking signifies a Red Delicious in its prime. With a faint but distinct sweet aroma, this is an apple ready to contribute to your tasty masterpiece.
Preparing Red Delicious Apples for Pie
Armed with a basket of your carefully chosen apples, it’s now time to prepare these babies for their pie-filling destiny. Let’s get right to the point, and let’s get our hands dirty.
Washing each apple under cool water will rid the surface of any lurking residues. Use a soft cloth to pat them dry, maintaining their lustrous appeal.
Now comes the peeling. While culinary enthusiasts might debate the inclusion of the skin, for Red Delicious and its slightly tougher hide, it is a wise choice to forego it. A good peeler should make quick work of this task. Remember, the goal is a smooth peel, to achieve thin apple slices that melt in your mouth.
Once peeled, quartering the apples and removing the core is our next objective. A steady hand and a sharp knife are all that’s required for this mission. Make sure to remove the seeds and any remnants of the core that might lead to a less than perfectly smooth bite.
Thin, even slices are crucial when preparing your apples for baking. Keep the slices about 1/4 of an inch for a consistent texture that cooks evenly. Why does this matter? One word: precision. It could be the difference between a well-balanced pie and one that’s unevenly cooked.
So, there you have it. The secret to picking out and preparing Red Delicious apples for a pie worthy of kitchen applause. Go forth and bake, armed with the knowledge of what makes the Red Delicious truly, delicious. There is power in our shared love of food that transcends boundaries. Embrace it, own it. Enjoy the simple pleasure that comes from the unified dance of hand-picked ingredients, passion, and a sprinkle of culinary adventure. After all, what’s life without a slice of incredibly tasty apple pie?
Creating a Perfect Pie Crust
Concocting the Quintessential Pie Crust for your Apple Pie: A Pastry Epiphany
A splendid apple filling, made from meticulously chosen and prepared Red Delicious apples, certainly elevates the allure of your homemade apple pie. However, the quintessential component that complements this enticing filling is the extraordinary pie crust. The hallmarks of a perfect pie crust are flakiness, tender texture, and buttery flavor that melts in your mouth – a true symphony of sensations. Today, let’s delve into the art of creating that wonderful crust which will make your apple pie a veritable masterpiece.
Crusts are more than just shields for the delectable filling within. They play a monumental role in representing your culinary prowess and adding an extra dimension to the taste. First things first, the ingredients. The golden ratio of a pie crust typically involves 2:1:1 of flour to fat to liquid. However, the recipe might vary depending upon the baker’s personal preference. To crate that flaky texture, bruise the flour with cold butter for a mealy mix, but remember, leave some butter chunks! These little dollops will melt in the oven and form pockets of steam which puff up, resulting in a divine flaky crust.
The next crucial step in creating that perfect pie crust concerns temperature – both of the ingredients and equipment! It’s imperative to keep everything cold – a chilly kitchen, refrigerated flour, ice-cold water, and of course, chilled butter. The chilled fat doesn’t mix with the flour, and these ‘unmixed’ butter particles play the pivotal role in creating that flakiness. A pro-tip for ensuring this, freeze your butter, and grate it directly into the flour.
In addition, prefer using a food processor for that precise mixing of flour and butter. Your warm hands can melt the butter, thwarting the chances for a flaky crust. Also, handle the dough minimally and with care. Overworking develops the gluten in the flour, making your crust tough rather than tender.
Now, when adding your liquid, tread with caution and moderation. Begin with half the amount, and gradually add as needed. The dough should just hold together when squeezed, not sticky or crumbly. The proverb ‘less is more’ significantly rings true here.
Post your careful assemblage of the dough, dutifully wrap it in plastic wrap, and refrigerate for an hour minimum. This relaxes the gluten preventing the dough from shrinking while baking, and also ensures that the fat is chilled before it hits the oven.
Rolling the dough is the final maneuver in your quest for that perfect pie crust. Remember to maintain evenness, which ensures uniform cooking. Also, endeavor to roll from the center outwards, and keep turning the dough after every roll, preventing it from sticking.
Subsequently, comes the operation of ‘blind baking’. This process involves partially or completely baking your pie crust before adding the filling, especially a wet one like apples. It hinders a soggy bottom, maintaining the structural integrity and the much-desired crunch of your apple pie.
Last but not least, an egg wash brushed on the pie crust before baking will give it an enchanting golden sheen.
Pair this perfect crust with your delightful apple filling, and you’ve got a homemade apple pie that connects hearts, sharing a delightful slice of happiness. Baking is a labor of love, transforming simple, everyday ingredients into something sublime. What could possibly be more enriching than sharing something so lovingly baked with friends and family, thereby deepening bonds over food, one pie at a time? Happy Baking!

Assembling and Baking the Apple Pie
Exploring beyond the art of selecting and prepping your Red Delicious apples and crafting the perfect pie crust, let’s dive into the heart of the process – assembling and cooking this coveted pie. It’s one thing to talk about food, but the real magic boils down to the act itself – assembling the ingredients, working with your hands, and witnessing the transformation of simple elements into something exquisite.
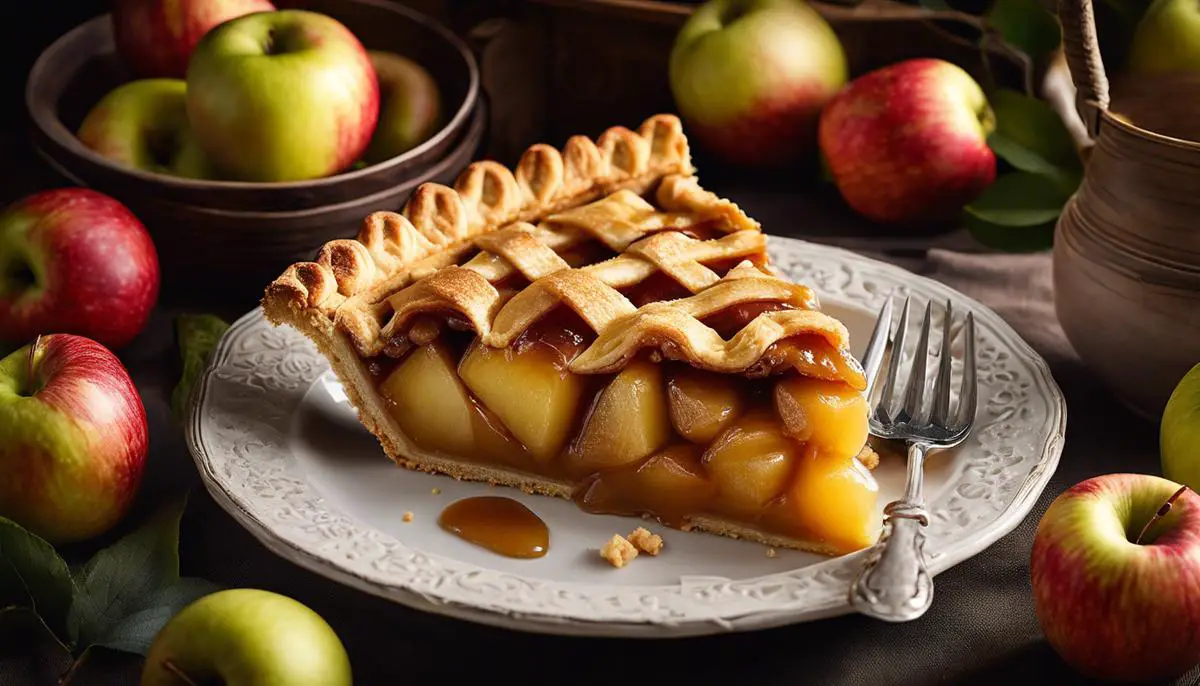
After you’ve expertly crafted your dough and sliced your apples to perfection, it’s time to assemble your pie. Start by placing your blind-baked pie crust on a baking sheet. Spread your apple slices, ensuring they overlay each other and form a dome-shape in the center. This tip is not widely known, but it enhances the aesthetic appeal of your baked pie and ensures an even bake.
Now, onto the pie filling – the soul of our apple pie. Mix your apple slices with sugar, a squeeze of lemon juice, a hint of nutmeg, and the star of the show – cinnamon. For pure decadence, don’t shy away from adding a liberal dollop of unsalted butter on top. This voluptuous mix creates the perfect balance between the sweet, tangy flavor of the apples and the warming spices. Gently pour this filling into your crust, ensuring an even spread.
For that extra tender, flaky crust, let’s do what many home bakers tend to skip — a lattice top. It may appear intimidating, but creating a lattice top is all part of the fun and experimentation! Roll out the remaining dough, cut into equal-sized strips and weave them over and under one another on top of your pie. Not only does this create a visually impressive pie, but it also gives your pie the right balance of crust and filling in every bite.
Brushing the top crust with an egg wash just before popping your pie in the oven will give it that golden-brown finish, adding to the visual spectacle of your baked delight. It’s these small, seemingly insignificant details that make an ordinary pie into a wondrous apple pie, perfect for sharing.
Ah, the heat of the oven – that final, vital stage. You’ll want to bake your pie in a preheated oven at 425 degrees for about 40-45 minutes. It’s all about watching, waiting, and salivating over the heavenly aromas wafting through your kitchen. This baking time allows your apples to become beautifully soft, your fillings wonderfully bubbly, and your crust perfectly golden.
The excitement that comes from pulling a homemade pie out of the oven, marveling at its golden lattice, and sharing slices among friends is unparalleled. Revel in each bite, savor the harmonious dance of the crisp crust and sweet apple filling, and most importantly, take immense satisfaction from the joy you’ve just spread with your homemade red delicious apple pie.
So, tie up that apron, get your hands on some Red Delicious apples, and set forth on your apple pie adventure! The perfect pie is just a bake away.
Lo and behold, the journey from a simple Red Delicious apple to a golden delicious pie is a rewarding venture that truly satisfies. You have absorbed techniques in picking and prepping apples, creating a tantalizing pie crust, and baking to perfection, all in the interest of perfecting the coveted apple pie. This journey is more than just a recipe; it’s a cherished technique, a treasured knowledge that would ensure every apple pie you bake hereafter embodies perfect texture, indulgent flavor, and that soulful touch of home.
