Welcome to the world of baking in Dreamlight Valley, where we will guide you through an adventure of creating a scrumptious apple pie. With detailed steps on ingredients and equipment, preparing the apples, making the crust, assembling, and baking, soon you’ll be a master at this classic dessert. Explore variations, adjustments, and perfect your apple pie-making skills as you dive into this delicious journey.
Ingredients and Equipment
Ingredients:
- 6-7 cups of peeled and thinly sliced Dreamlight Valley apples (preferably a mix of tart and sweet varieties like Granny Smith and Honeycrisp)
- 1 cup granulated sugar
- 1/4 cup all-purpose flour
- 1/2 teaspoon ground cinnamon
- 1/4 teaspoon ground nutmeg
- 1/4 teaspoon salt
- 2 tablespoons unsalted butter, cut into small pieces
- 1 tablespoon lemon juice (optional)
- 1 large egg + 1 tablespoon of water (for egg wash)
For the pie crust:
- 2 1/2 cups all-purpose flour
- 1/2 teaspoon salt
- 1 cup unsalted butter, cold and cut into cubes
- 1/4 to 1/2 cup ice water
- Some extra flour for rolling out the dough
Equipment:
- Pie dish (9-inch, preferably glass or ceramic)
- Mixing bowls
- Vegetable peeler
- Sharp knife
- Cutting board
- Measuring cups and spoons
- Rolling pin
- Pastry brush
- Fork or pastry blender (for mixing the pie dough)
- Mixing spoon or spatula
- Plastic wrap
- Tin foil or pie crust shield
- Oven mitts
- Cooling rack
- Sharp knife or pie server for slicing and serving the pie
Instructions:
Preparing the pie crust:
- In a large mixing bowl, whisk together 2 1/2 cups flour and 1/2 teaspoon salt.
- Add the cold, cubed butter and use a fork or pastry blender to cut the butter into the flour until the mixture resembles coarse crumbs.
- Gradually add ice water, starting with 1/4 cup, and mix using a spatula until the dough starts to come together. Add more water, one tablespoon at a time, if necessary.
- Lightly flour your working surface and turn the dough out onto it. Gently knead the dough just until it forms a ball.
- Divide the dough into two equal parts and shape them into discs. Wrap each disc in plastic wrap and refrigerate for at least 30 minutes.
Preparing the apple filling:
- Peel and thinly slice the apples, placing them in a large mixing bowl.
- Add the sugar, flour, cinnamon, nutmeg, salt, and lemon juice (if using) to the apples. Toss until the apples are evenly coated with the mixture.
Assembling the pie:
- Preheat your oven to 425°F (220°C).
- Remove one of the chilled dough discs from the refrigerator. Roll it out on a lightly floured surface until it is large enough to cover the bottom and sides of your pie dish.
- Gently transfer the rolled-out dough to the pie dish, pressing it gently into the corners and bottom. Trim the excess dough, leaving about a 1/2-inch overhang.
- Fill the pie crust with the apple filling, making sure to evenly distribute the apples. Dot the top with the 2 tablespoons of unsalted butter.
- Roll out the second dough disc and gently place it over the top of the apple filling, pressing the edges together to seal. Trim any excess dough and crimp the edges, using your fingers or the tines of a fork.
- Use a sharp knife to cut a few slits in the top crust to allow steam to escape during baking. Whisk together the egg and water to create an egg wash, then lightly brush the top crust with the egg wash.
- Place the pie on a baking sheet (to catch any possible spills) and place it in the preheated oven. Bake for 20 minutes at 425°F (220°C), then reduce the temperature to 375°F (190°C) and continue baking for another 35-45 minutes, until the crust is golden brown and the filling is bubbly. If the edges of the pie crust begin to brown too quickly, cover them with foil or a pie crust shield.
- Remove the pie from the oven and place it on a cooling rack. Allow it to cool for at least 2 hours before slicing and serving. Enjoy your homemade apple pie from Dreamlight Valley!
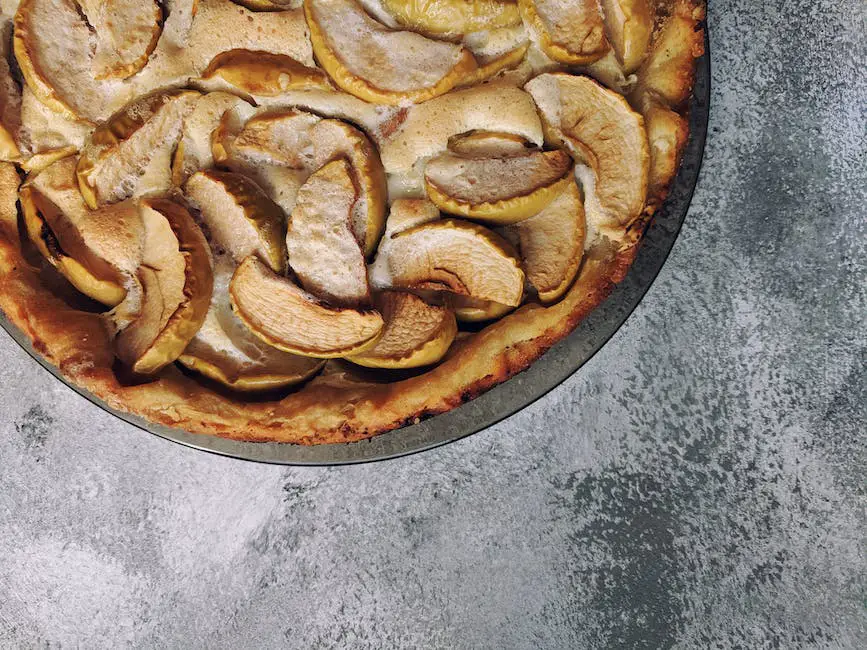
Preparing the Apples
Selecting the apples:
For the best flavors in your Dreamlight Valley apple pie, choose a mix of sweet and tart apples. Some good options are Granny Smith, Honeycrisp, Braeburn, and Golden Delicious apples. You will need approximately 6-8 medium-sized apples for a standard 9-inch pie.
Washing the apples:
Wash the apples thoroughly under cold, running water to remove any dirt, pesticides, or debris. Use a soft bristle brush or your hands to gently scrub the surface of each apple. Pat them dry with a clean kitchen towel or paper towel.
Peeling the apples:
Using a vegetable peeler or a sharp paring knife, carefully remove the skin from the apples. Hold the apple firmly in one hand and the peeler or knife in the other. Start at the top of the apple, near the stem, and work your way down in a circular motion. Be sure to remove any blemishes or brown spots as you go.
Coring the apples:
Place the apple upright on a cutting board. Using a sharp chef’s knife or an apple corer, cut around the core of the apple, starting at the top and moving down to the bottom. Remove the core along with any seeds. If using an apple corer, insert the corer into the center of the apple and push down, extracting the core.
Slicing the apples:
Lay each apple half flat on the cutting board. Cut the apples into even slices, approximately 1/4-inch thick, ensuring consistent baking and texture in your pie. If you prefer thinner or thicker slices, adjust accordingly.
Preventing browning:
To prevent the apple slices from browning, place them in a bowl of cold water with a splash of lemon juice or vinegar while you continue slicing the remaining apples. This will help keep your apples looking fresh and vibrant.
Proceed with your Dreamlight Valley apple pie recipe:
Once you have finished preparing your apples, drain them well and proceed with your Dreamlight Valley apple pie recipe. Enjoy the process, and savor the delicious results!

Making the Crust
Making the Crust for Dreamlight Valley Apple Pie
Ingredients:
- 2 1/2 cups all-purpose flour
- 1 teaspoon salt
- 1 teaspoon sugar
- 1 cup (2 sticks) cold unsalted butter, cut into small pieces
- 1/4 to 1/2 cup ice water
Tools:
- Large mixing bowl
- Pastry cutter or fork
- Rolling pin
- 9-inch pie dish
- Plastic wrap
- Sharp knife
Instructions:
- Combine dry ingredients: In a large mixing bowl, whisk together the flour, salt, and sugar.
- Add butter: Add the cold, unsalted butter pieces into the bowl with the dry ingredients. Make sure the butter is cold, as this will help to create a flaky crust.
- Cut in butter: Using a pastry cutter or a fork, cut the cold butter into the flour mixture until it resembles a coarse meal with pea-sized pieces of butter throughout.
- Add water: Gradually add 1/4 cup ice water to the flour mixture, mixing with your hands or a spoon just until it comes together in a loose, shaggy ball. If needed, you can add an additional 1 tablespoon of ice water at a time, up to 1/2 cup total, until the dough is the right consistency.
- Divide dough: Divide the dough into two equal halves. Shape each half into a disk, and wrap each disk in plastic wrap.
- Chill dough: Place the wrapped dough into the refrigerator to chill for at least 1 hour, or up to 24 hours.
- Roll out the dough: When you’re ready to make the pie, remove one disk of dough from the refrigerator and let it sit at room temperature for a few minutes to soften slightly. Unwrap the chilled dough and place it on a lightly floured surface. Roll the dough into a circle that is about 1/8-inch thick and about 12 inches in diameter.
- Fit the dough into the pie dish: Carefully transfer the rolled dough to your 9-inch pie dish, gently easing the dough into the dish. Use a sharp knife to trim any excess dough around the edges of the pie dish, leaving about a 1-inch overhang.
- Reserve the second dough disk for the top crust or make a second pie. You can also freeze it for later use.
- Add the apple filling (according to the apple pie recipe you are using) and proceed with finishing the pie.
Now your Dreamlight Valley apple pie crust is ready for the filling and to be baked into the perfect dessert! Enjoy!
Preparing the Filling
Ingredients
- 6-7 cups of peeled, cored, and thinly sliced apples (preferably Granny Smith or a mix of tart and sweet apples)
- 3/4 cup granulated sugar
- 1/4 cup light brown sugar, packed
- 2 tablespoons all-purpose flour
- 1 tablespoon lemon juice (freshly squeezed is best)
- 1/2 teaspoons ground cinnamon
- 1/4 teaspoon ground nutmeg
- 1/4 teaspoon ground allspice (optional)
- 1/4 teaspoon salt
Instructions
- Choose the right apples: Begin by selecting good-quality apples for your pie filling. Granny Smith apples are highly recommended for their tart flavor and firm texture, which hold up well during baking. You can also mix in some sweeter apple varieties if desired.
- Prepare the apples: Thoroughly wash the apples and then peel their skins using a vegetable peeler or a sharp knife. After peeling, core the apples using an apple corer or a small knife. Slice the apples into thin, even pieces, approximately 1/4-inch thick.
- Prevent browning: To prevent the apple slices from turning brown, toss them with the freshly squeezed lemon juice in a large mixing bowl as you slice.
- Combine dry ingredients: In a separate bowl, combine the granulated sugar, light brown sugar, all-purpose flour, ground cinnamon, ground nutmeg, ground allspice (ifUsing), and salt. Whisk the mixture until the ingredients are well combined and evenly distributed.
- Mix apples with dry ingredients: Pour the dry sugar-spice mixture over the sliced apples. Toss the apple slices gently using a spatula or your clean hands, making sure that they’re well coated with the mixture.
- Rest the filling: Let the apple filling mixture rest at room temperature for about 30 minutes, allowing the flavors to meld and the sugar to extract the apple’s natural juices. This will create a deliciously sweet and spiced filling, perfect for your apple pie.
- Preheat oven: During this resting time, preheat your oven to 425°F (220°C) so it’ll be ready for your pie crust and filling.
- Prepare pie crust: While the filling is resting, prepare your pie crust according to your favorite recipe or using a store-bought crust. Make sure you have a bottom and a top crust ready for assembling the pie.
- Bake: Once your filling has rested, and your pie crusts are ready, you can proceed with assembling and baking your apple pie. Bake in the preheated oven for 45-50 minutes, or until the crust is golden brown and the filling is bubbling. Enjoy!
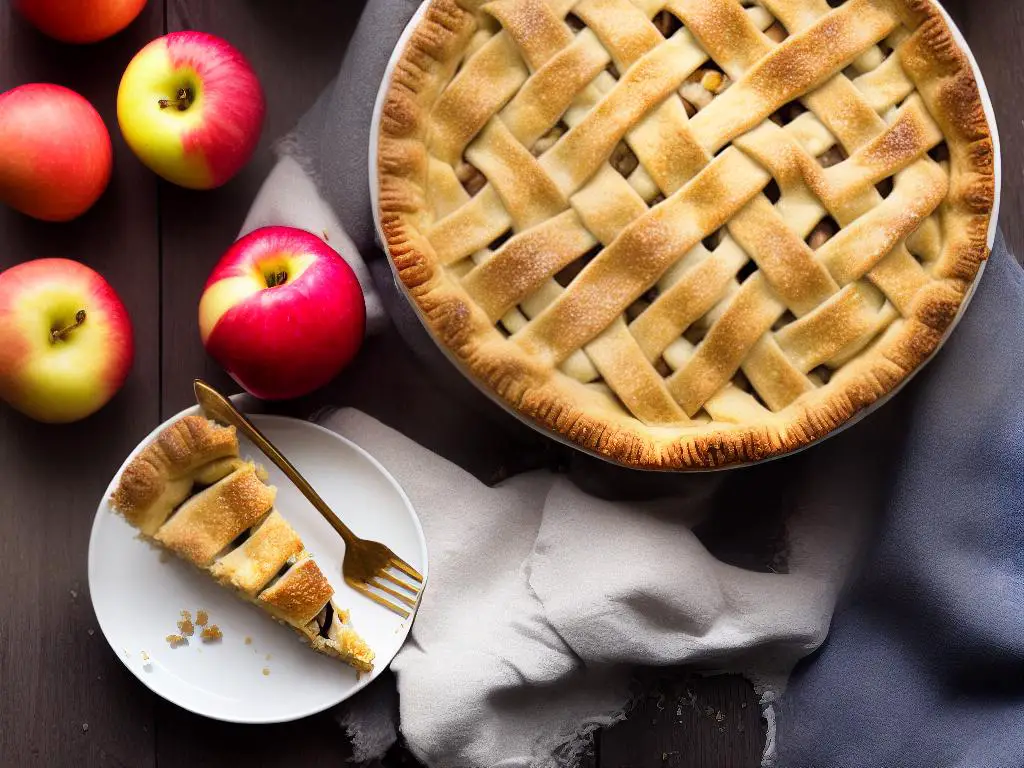
Assembling the Pie
How to Make Apple Pie in Dreamlight Valley: Assembling the Pie
Follow these step-by-step instructions to learn the proper techniques for assembling your apple pie in Dreamlight Valley. We will cover how to add the filling, apply a top crust or lattice design, and crimp the edges.
Ingredients:
- Prepared pie crust dough (enough for a double-crust pie)
- 6 cups sliced, peeled apples (about 6-8 medium-sized apples)
- 3/4 cup granulated sugar
- 2 tablespoons all-purpose flour
- 1 teaspoon ground cinnamon
- 1/4 teaspoon ground nutmeg
- 1/4 teaspoon salt
- 1 tablespoon lemon juice
- 1 tablespoon water
- 1 large egg (optional, for egg wash)
- 1 tablespoon milk or cream (optional, for egg wash)
Instructions:
- Preheat your oven to 425°F (218°C).
- Roll out half of your prepared pie crust dough on a lightly floured surface to form a circle that is 2 inches larger than your pie dish. Carefully transfer the rolled-out dough to your 9-inch pie dish, ensuring that it is centered. Gently press the dough into the bottom and up the sides of the dish.
- In a large bowl, combine the sliced apples, sugar, flour, cinnamon, nutmeg, salt, lemon juice, and water. Stir until the apples are evenly coated with the sugar and spices.
- Pour the apple filling into the prepared pie crust, spreading it out evenly.
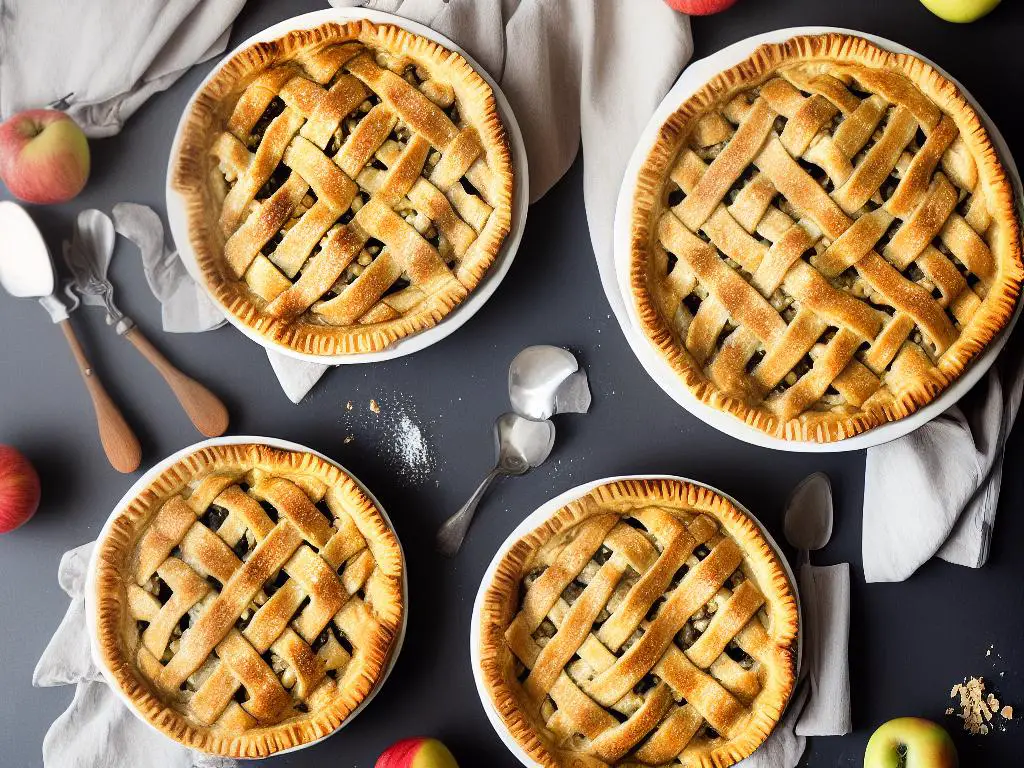
- Now, you have two options for the top crust: a full top crust or a lattice design.
- a) For a full top crust:
- Roll out the remaining pie crust dough to form a circle that is 1 inch larger than your pie dish.
- Gently place it over the apple filling, centering it on the pie.
- Trim the excess dough from the edges, leaving a 1-inch overhang.
- Roll the overhanging dough under itself along the rim of the pie dish, and press down to seal.
- Cut a few small slits in the center of the top crust to allow steam to escape during baking.
- b) For a lattice design:
- Roll out the remaining pie crust dough and cut it into even strips (about 1/2 to 1 inch wide).
- Lay half of the strips horizontally across the filling.
- Fold back every other strip and place a new strip vertically across the center of the pie. Unfold the folded strips back over the vertical strip.
- Continue this process, folding back alternating horizontal strips and placing new vertical strips, until you’ve created a woven lattice pattern.
- Trim the excess dough from the edges, leaving a 1-inch overhang.
- Roll the overhanging dough under itself along the rim of the pie dish, and press down to seal.
- To crimp the edges, use your thumb and index finger on one hand to create a “V” shape and press the dough between your fingers and the thumb of your other hand. Continue this process along the entire edge of the pie, creating a decorative crimped border.
- Optional: In a small bowl, whisk together the egg and milk or cream to create an egg wash. Using a pastry brush, lightly coat the top crust and edges of the pie with the egg wash. This will give your pie a shiny, golden-brown finish.
- Place the pie on a baking sheet to catch any filling that may bubble over during baking. Bake for 45-55 minutes or until the crust is golden brown and the filling is bubbling. If the edges of the pie are browning too quickly, cover them loosely with aluminum foil.
- Remove the pie from the oven and allow it to cool on a wire rack for at least 2 hours before serving. This will give the filling time to set.
Enjoy your delicious homemade apple pie in Dreamlight Valley!
Baking Tips and Techniques
Baking Tips and Techniques: How to Make Apple Pie in Dreamlight Valley
Follow these best practices for baking your Dreamlight Valley apple pie to avoid common issues such as a soggy bottom or burnt crust.
1. Choose the right apples:
For a perfectly balanced apple pie, use a combination of sweet and tart apples. Some good options are Granny Smith, Northern Spy, and Golden Delicious. You can also incorporate regional apples from Dreamlight Valley for a unique local flavor.
2. Prepare the apples:
Peel, core, and slice the apples thinly and evenly, so they cook uniformly. Toss the apple slices with lemon juice to prevent browning and to add a little extra tanginess.
3. Make a well-balanced filling:
Combine the apple slices with sugar, flour, cinnamon, nutmeg, and a pinch of salt. The sugar should not be overly sweet and should complement the apples’ natural flavors. The flour will help to thicken the filling and avoid a soupy pie. Add in some Dreamlight Valley vanilla extract for extra depth of flavor.
4. Use a reliable pie crust recipe:
A flaky, buttery crust is essential for a delicious apple pie. Choose a crust recipe that has been tested and proven to work well. Be sure to chill the pie dough before rolling it out for best results.
5. Roll out your crust evenly:
Roll the pie dough to an even thickness, ensuring there are no thin spots or holes. This is important, especially for the bottom crust, as it will keep the juices from making the crust soggy.
6. Create a strong crust-to-filling seal:
Make sure to firmly press the edges of the top and bottom crusts together to form a tight seal. This will help to keep the filling contained and prevent the crust from becoming soggy.
7. Preheat the oven:
Preheating the oven ensures that your pie will start baking immediately when placed inside, helping to avoid a soggy bottom.
8. Vent your pie:
Cut slits or designs into the top crust to allow steam to escape while baking. This prevents the crust from becoming soggy and helps the filling to cook evenly.
9. Protect the outer crust:
To avoid a burnt crust, you can use a pie shield or aluminum foil to protect the edges of the pie. Place the shield or foil around the outer crust about halfway through baking.
10. Bake on the lower rack:
Baking your apple pie on the lower rack of the oven helps to ensure that the bottom crust cooks through without the top crust becoming too dark.
11. Adjust baking time as needed:
Different ovens may require slightly different baking times, depending on factors like altitude and humidity. Keep a close eye on your apple pie and adjust the baking time if necessary.
By following these best practices, you can enjoy a perfectly baked Dreamlight Valley apple pie with a flaky crust and delicious filling, free of common issues such as a soggy bottom or burnt crust.
Serving and Storing
Cooling Your Apple Pie:
- After taking your freshly baked apple pie out of the oven, place it on a wire rack to allow for air circulation while it cools down.
- Let the pie cool for at least 2-3 hours at room temperature. This will help the filling to set and make it easier to slice and serve.
Slicing and Serving Your Apple Pie:
- Before slicing your apple pie, make sure it has cooled down adequately, as previously instructed.
- Choose a sharp knife or a pie server to cleanly slice through the crust and filling.
- Carefully cut the pie into equal wedges. A good guideline is to create at least 8 slices for a standard 9-inch pie.
- Gently slide your serving utensil under each slice, making a slight scooping motion to lift it out of the pie plate.
- To enhance your Dreamlight Valley apple pie experience, serve each slice with a scoop of vanilla ice cream, whipped cream, or a drizzle of caramel sauce.
Storing Leftover Apple Pie:
- When your pie has cooled down and you have enjoyed your servings, cover any leftovers by loosely wrapping the pie in aluminum foil or plastic wrap. This will shield your pie from air exposure and preserve its freshness.
- Store the wrapped pie at room temperature for 2-3 days. If you prefer a chilled pie, you may also store it in the refrigerator, keeping in mind that refrigeration may alter the pie’s texture slightly.
- For longer-term storage, consider freezing your leftover pie. To do so, wrap the pie in a layer of plastic wrap, followed by a layer of aluminum foil to protect it from freezer burn.
- To enjoy your frozen pie, thaw it at room temperature or in the refrigerator for several hours before slicing and serving. You can also reheat your apple pie in the oven at around 350°F for 15-20 minutes, or until heated through.

Variations and Adjustments
Variations and Adjustments: Customizing Your Dreamlight Valley Apple Pie Recipe
Apple pie is a classic American dessert that has been enjoyed for generations. In Dreamlight Valley, we’re taking this timeless treat and giving it a unique twist with several customizations and adjustments to make it suitable for various dietary needs and preferences. Here are some creative ideas to help you craft the perfect apple pie for your family and friends.
1. Gluten-Free Crust:
For those who need a gluten-free option, there are many gluten-free flours available on the market that can be used for pie crusts. Simply substitute the all-purpose flour in your recipe with a gluten-free flour blend. You may need to slightly adjust the amount of liquid in your crust recipe to achieve the right consistency.
2. Dairy-Free/Vegan:
If you want to make a dairy-free or vegan apple pie, you can substitute the butter in the crust with a dairy-free butter alternative or coconut oil in a 1:1 ratio. For a vegan pie, replace the eggs with a flax egg (mix 1 tbsp ground flaxseed with 3 tbsp water for each egg) in the filling.
3. Sugar-Free:
To make a sugar-free apple pie, use a sugar substitute like Stevia, Erythritol, or Xylitol in place of white and brown sugar. Make sure to adjust the sugar substitute’s quantity according to its sweetness level.
4. Spiced Apple Pie:
Add some warmth and dimension to your apple pie by incorporating spices into the filling. Cinnamon is a classic choice, but try experimenting with nutmeg, allspice, ginger, or a combination that complements the apples’ flavor.
5. Caramel Apple Pie:
For a rich, gooey twist on the classic apple pie, drizzle caramel sauce on the apples before adding them to the pie shell. You can use store-bought or homemade caramel sauce. To make your own, heat sugar, butter, and heavy cream in a saucepan, stirring until smooth and thickened.
6. Apple Crumble Pie:
If you want the best of both worlds, combine your apple pie with an apple crumble dessert. Prepare the apple pie as usual, but before baking it, sprinkle a crumble topping made of flour, sugar, butter, and spices over the top of the filling. This will give your pie a deliciously crunchy, sweet layer.
7. Lattice-Top Apple Pie:
For a stunning presentation, create a lattice-top crust for your apple pie. Roll out half of your pie dough and lay it over the filling, then cut the remaining dough into long strips. Weave these strips over and under each other, creating a lattice grid. Trim and crimp the edges to secure them together.
8. Nutty Apple Pie:
Add an extra layer of flavor and texture to your apple pie by incorporating nuts into the filling. Chopped pecans, walnuts, or almonds can be mixed with the apple slices or sprinkled on top of the pie. For a truly decadent twist, you could even add a layer of chopped nuts on the pie crust before adding the apple filling.
9. Deep-Dish Apple Pie:
If you’re looking to create an extra-thick, hearty apple pie, you can use a deep-dish pie pan instead of a standard pie dish. Adjust the amount of filling accordingly – you may need to use more apples to fill the deeper dish. You may also need to increase the baking time to ensure the filling is cooked through.
10. Mini Apple Pies:
For a fun, individualized treat, divide your pie dough and filling into smaller portions and create mini apple pies in muffin tins. This is a perfect option for parties or events where you want to offer single-serve desserts.
Conclusion:
With these creative ideas and variations, you can customize your Dreamlight Valley apple pie recipe to best suit your family’s tastes and dietary needs. Don’t be afraid to experiment and try new combinations – the sky’s the limit when it comes to crafting the perfect apple pie!